Tag Archives: DIY wooden projects

DIY Christmas – Rustic Trees

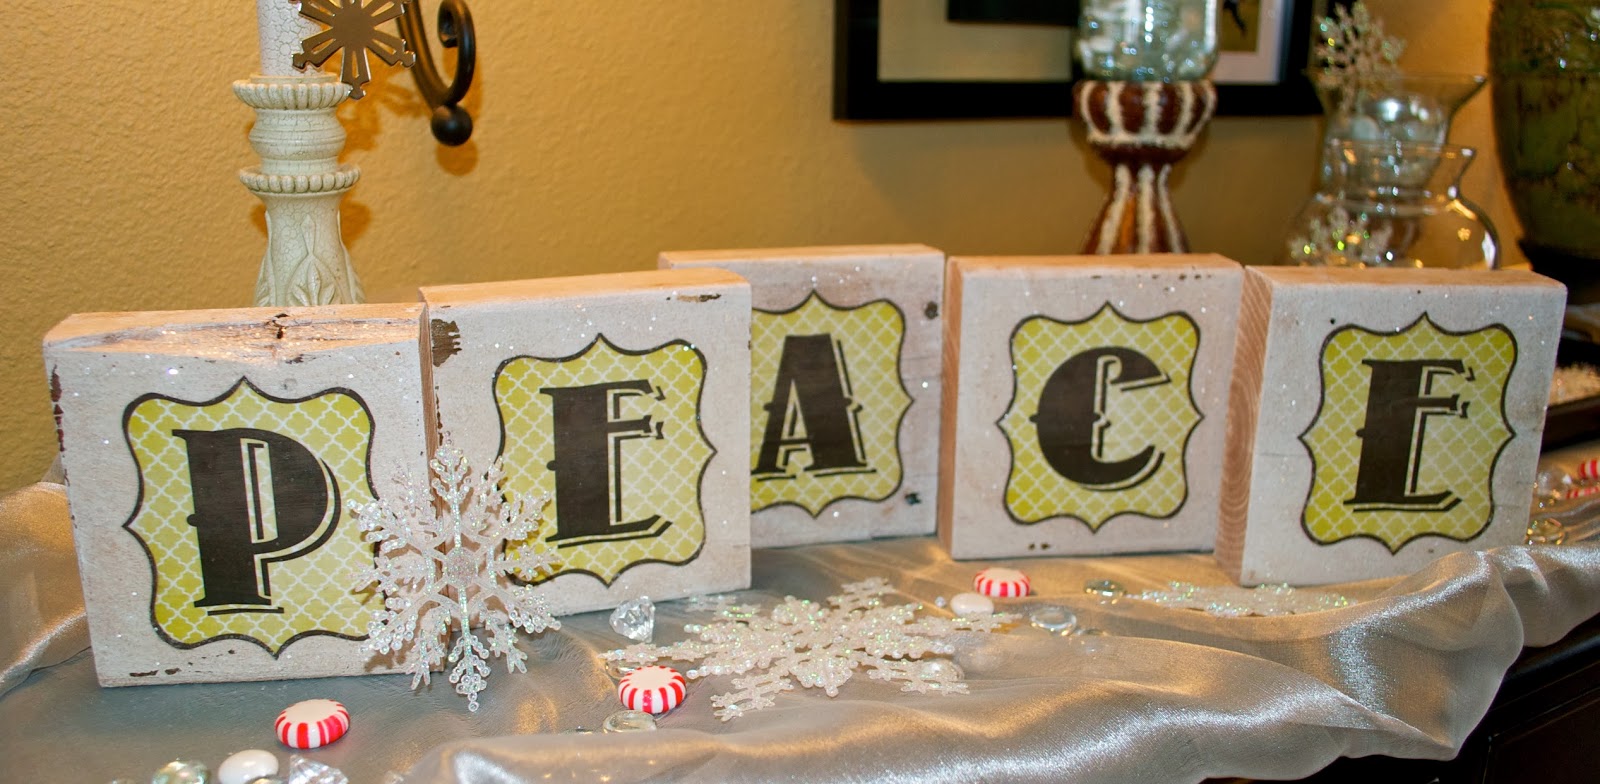
So I’ve been busy lately, really busy making Christmas gifts and rustic Christmas decor for the home. And let me tell you, you won’t be disappointed! So get ready, cuz over the next three blog posts, I’m going to be posting some DIY Christmas projects that might just help you out in a pinch for those final gifts or decor of your own.

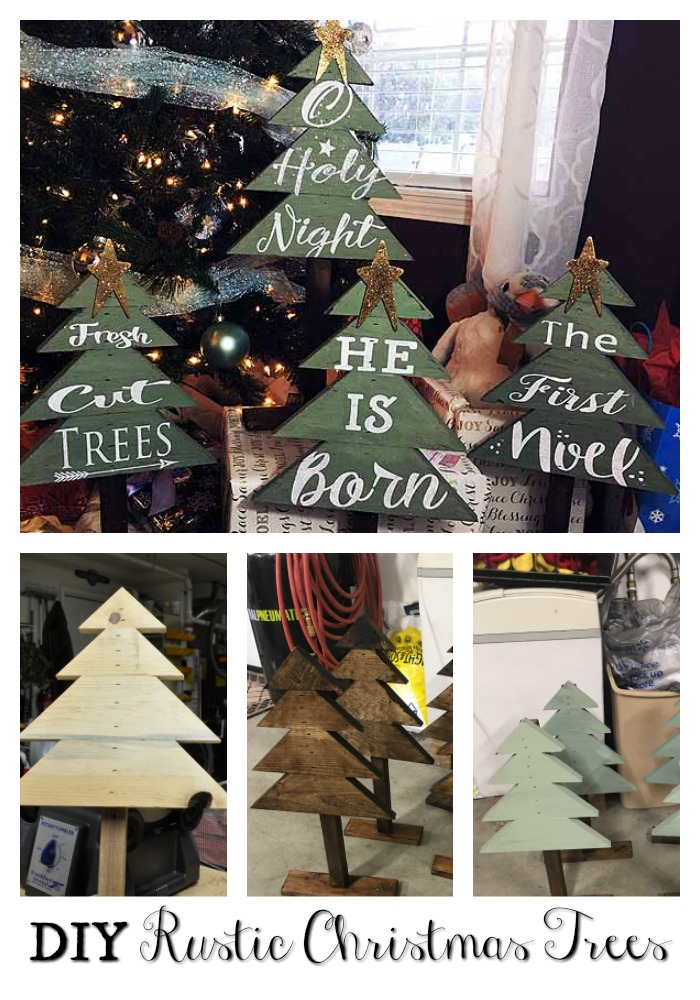
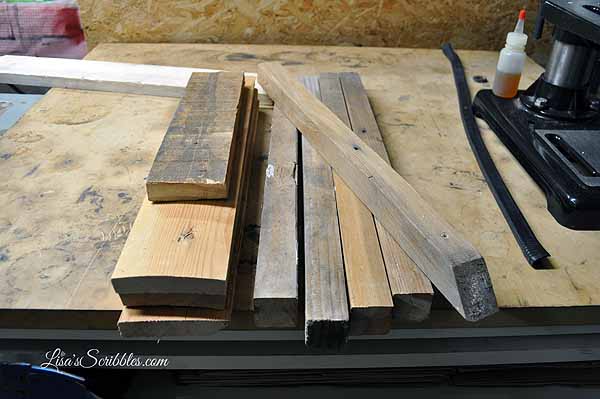
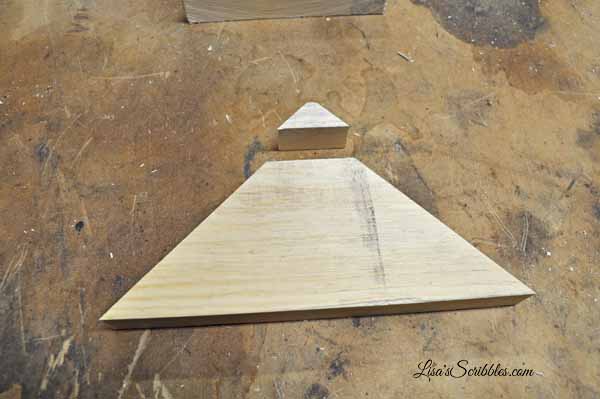
Let’s start with my new little Rustic Christmas Trees. And then let me continue by telling you that they weren’t supposed to look like this…nope, they were supposed to be bigger! The hubby was helping me out this past weekend, and I brought in a bunch of pallet wood with a design in mind to create a large tree for the front porch. I got busy working on about 50 other projects, because who really wants to focus in on one thing at a time, and he began cutting some pieces for me. By the time I took notice and realized they were much small than I intended, I was absolutely in love with them! 

Pretty cute already, right? All it took was me seeing the pint-sized wonders, and I was all over it! I then hurriedly made my way out to the shed in search wood to use for the trunk and something to make a stand out of. It didn’t take me long to find some old spindles from a deck removal we did a few years back and some smaller pieces to be used for the base. 

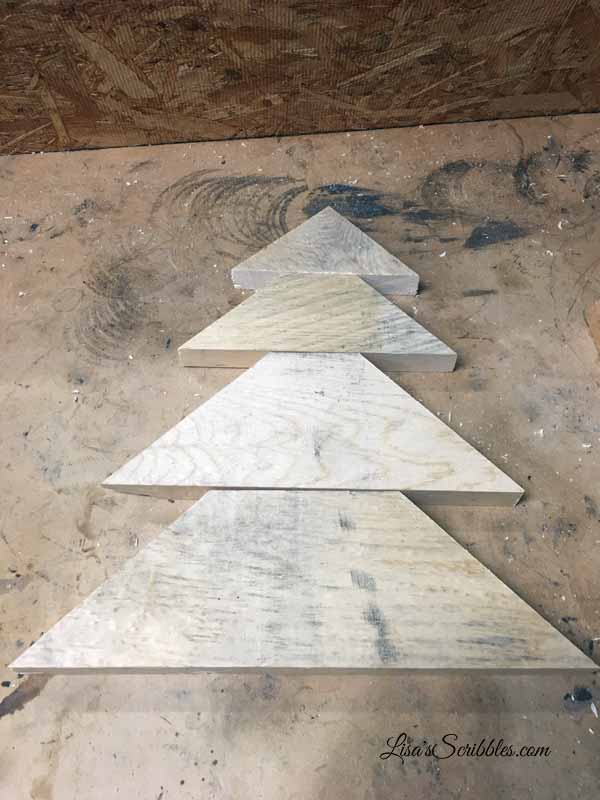
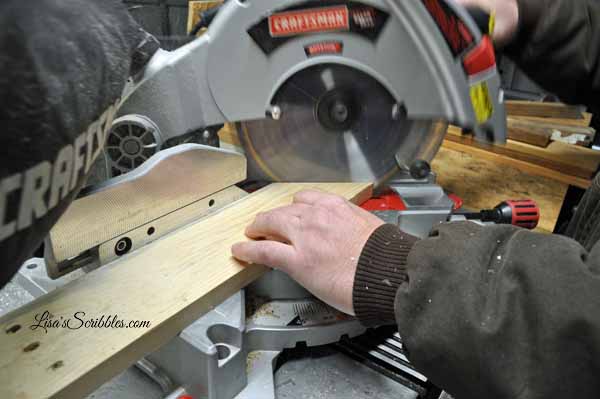
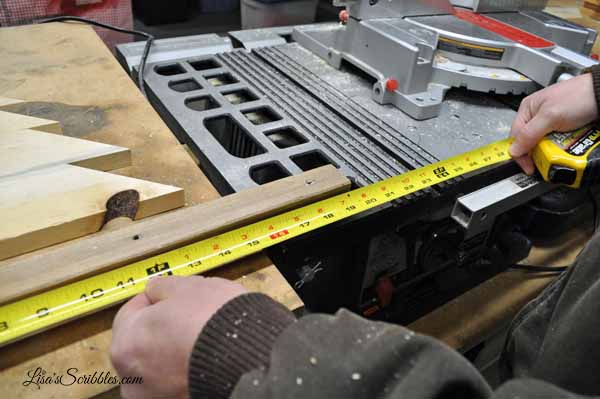
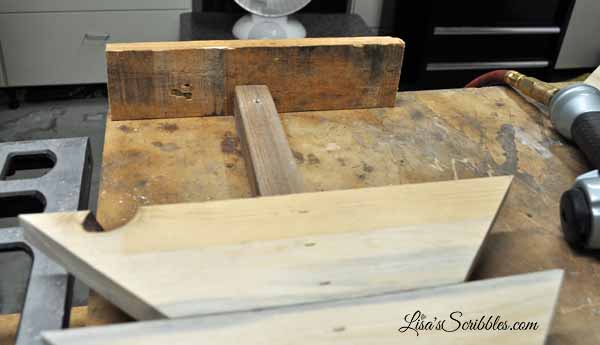
Once I had everything I needed, we started the process of cutting the pallet wood using 45-degree angles. 

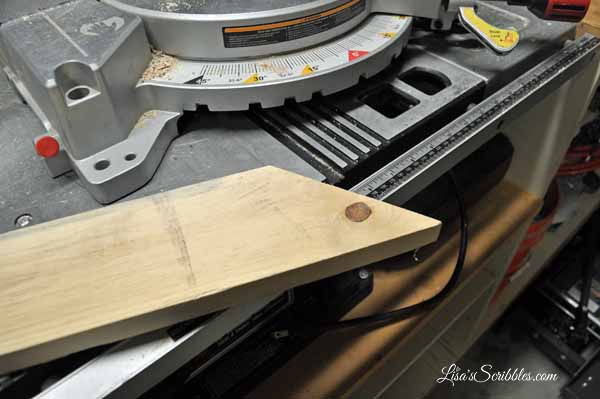
The first cut was at a 45-degree angle.

The second cut was straight giving us the top of the tree. 

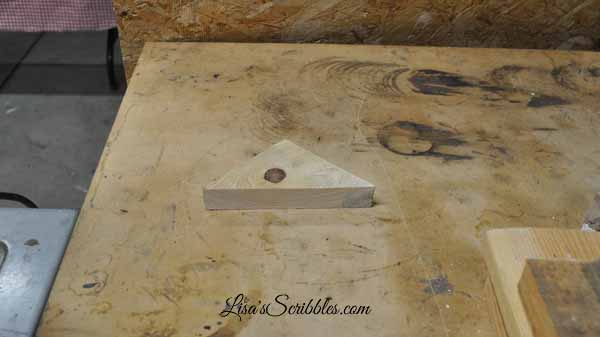
The third cut was similar to the first.


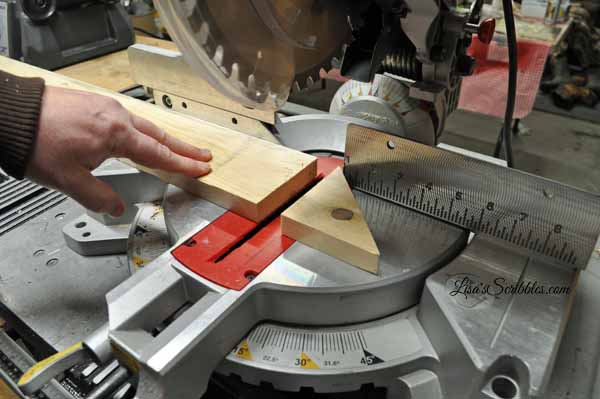
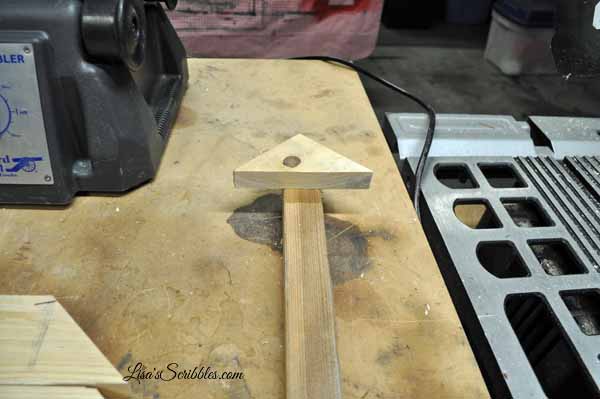
I wanted everything at odd numbers, odds for some reason always look better.

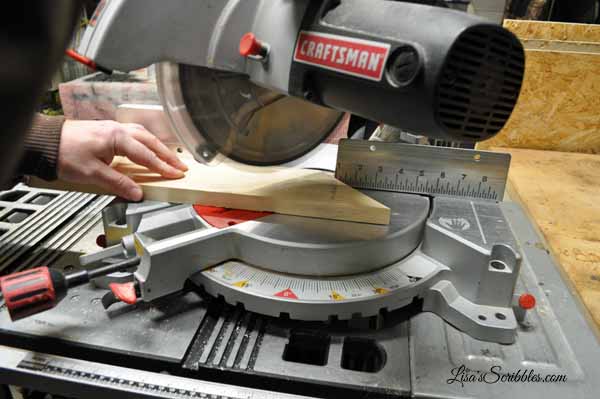
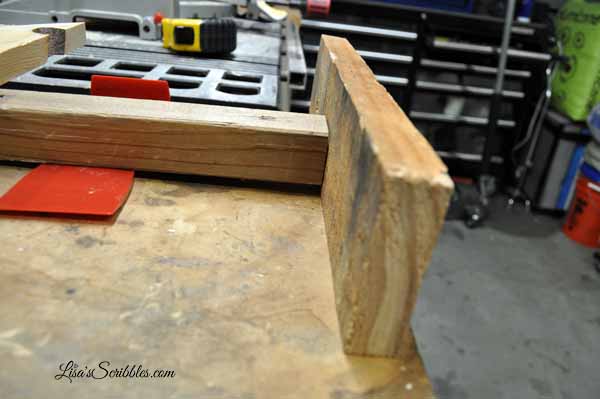
For the second branch of the tree, we cut it at another 45-degree angle.

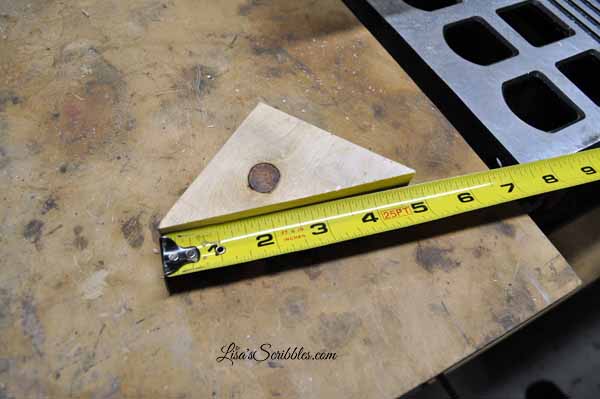
And here’s the important cut, you need to take off just a small cut on the top of the second piece of the tree, so it will butt up against the first.

Like so.

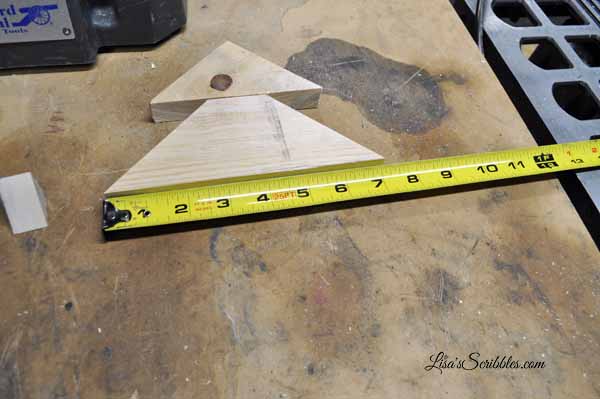
Pulling out the measuring tape, we ended up with 7-inches.

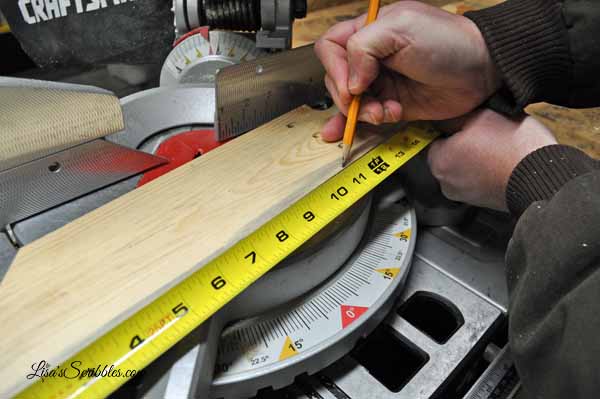
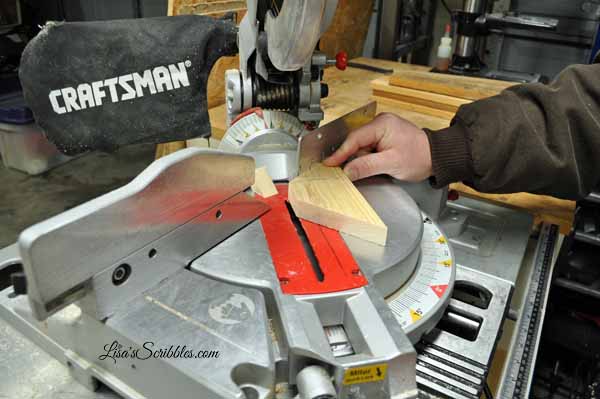
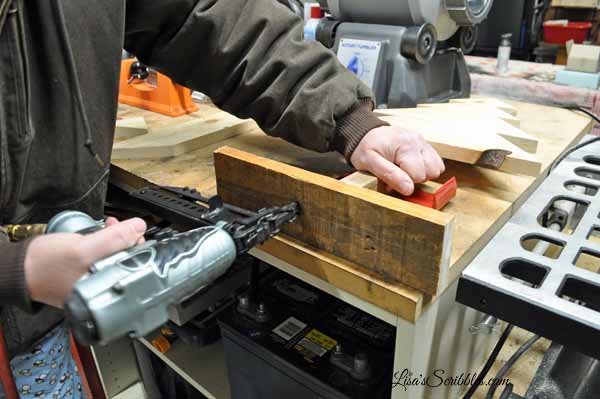
You keep repeating this process each time. The third branch is measured out at about 11-inhces and then cut at a 45-degree angle. 

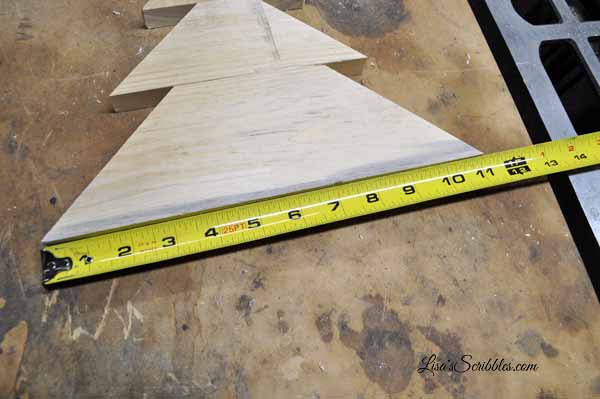
With the final cut coming in at 13-inches.


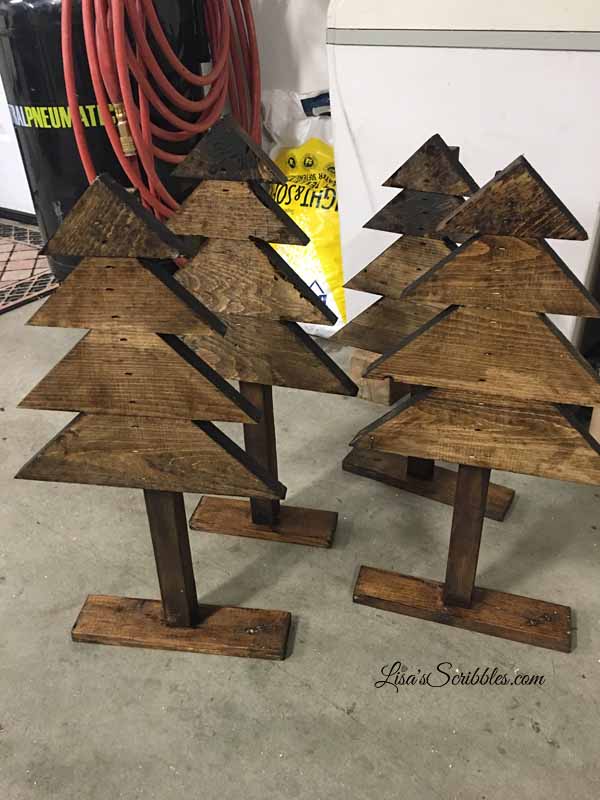
I then took the old deck spindle and measured it to about 19-inches, taking care that both ends were square. 

We then placed them on the spindle and nailed them in place with my pneumatic stapler using long enough staples to go through all the wood and hold it securely. 

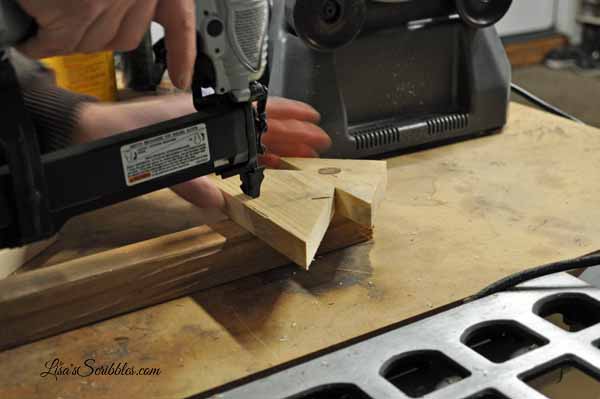
Once all the branches are attached, it was time to add the base so it could rest on a table top or floor without falling over.

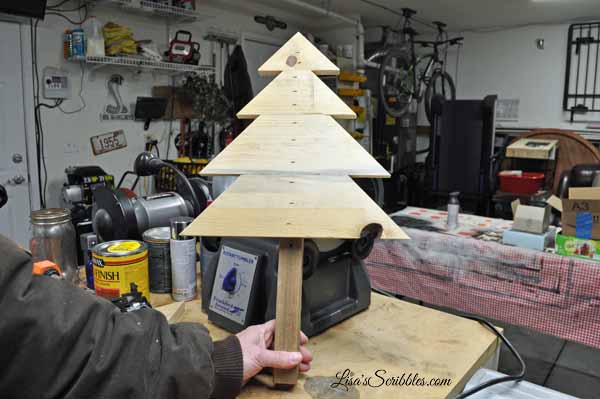
Resting it directly against the back of the floor stand wouldn’t work, so we added a small spacer behind it to give us the right amount of clearance. 

We went with an 11-inch base to give it the support it needs, so it won’t easily topple over.

And secured it in place again with the pneumatic stapler.

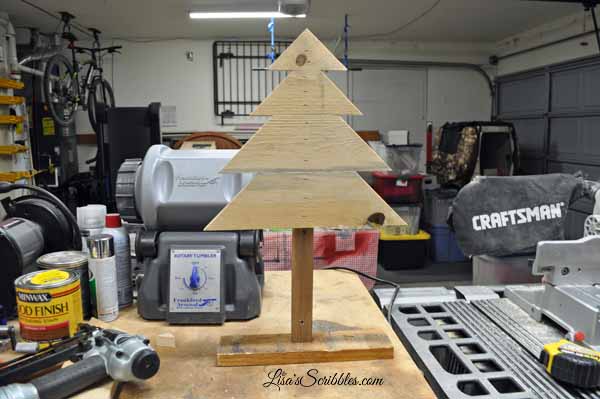
See, it stands up all by itself. 

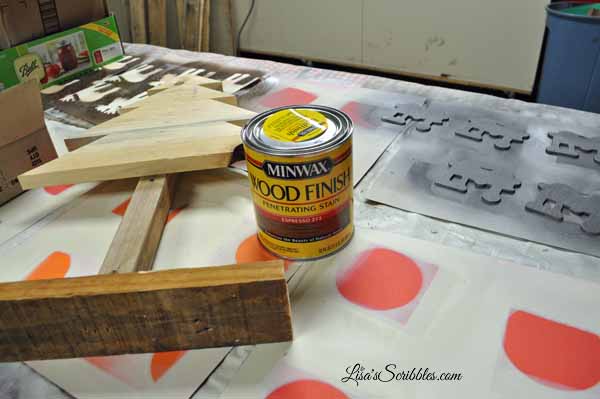
Now here’s where your creativity shines. I decided to stain the entire tree because I wanted parts of the stain to show through when I rough sanded it a little at the end.


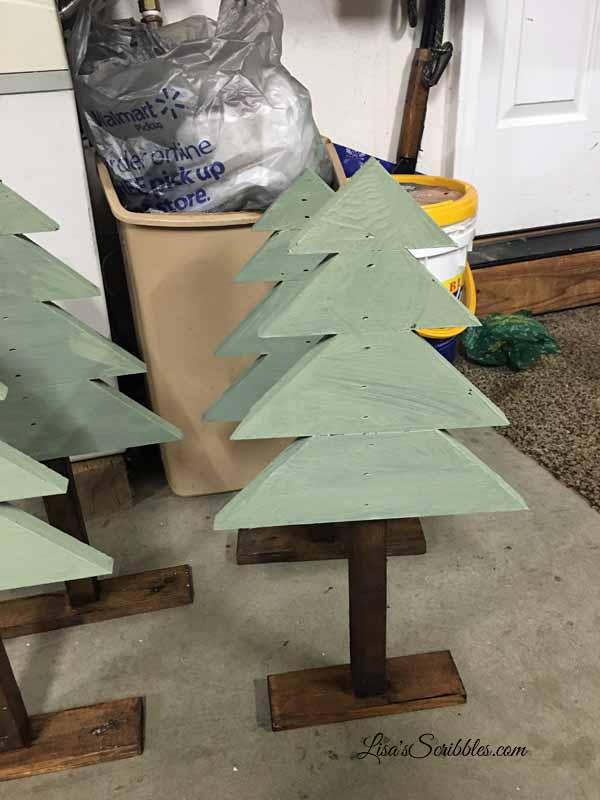
Add some green paint and let dry.

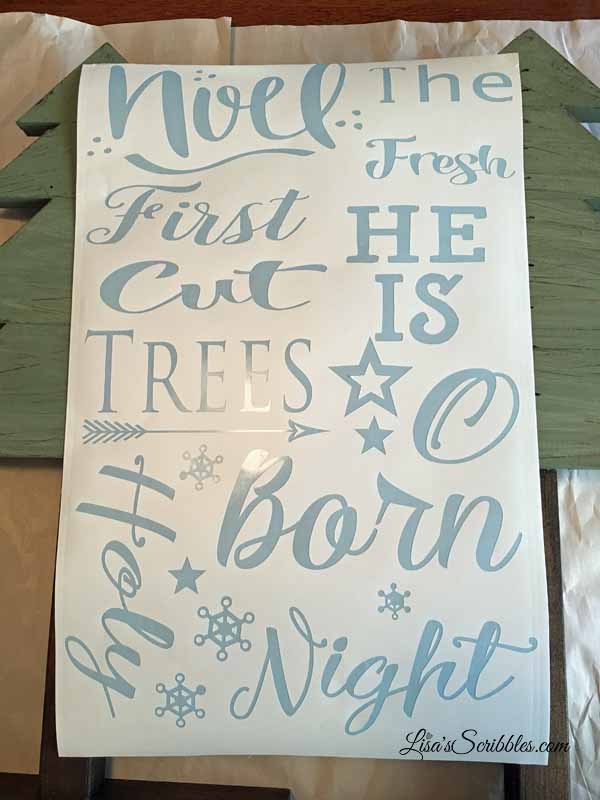
I used my Cameo Silhouette to make a stencil so I could paint words on the trees. Now, if you’re good with painting free-hand letters, go for it! I don’t do that well with it so I use the tools I have to make it look good.

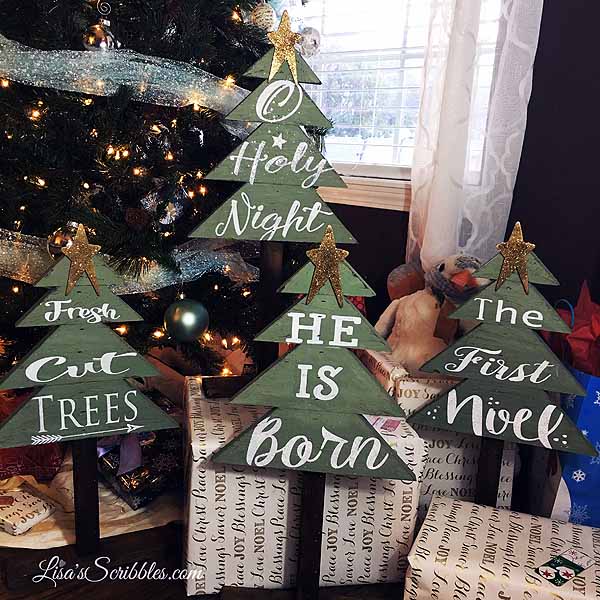
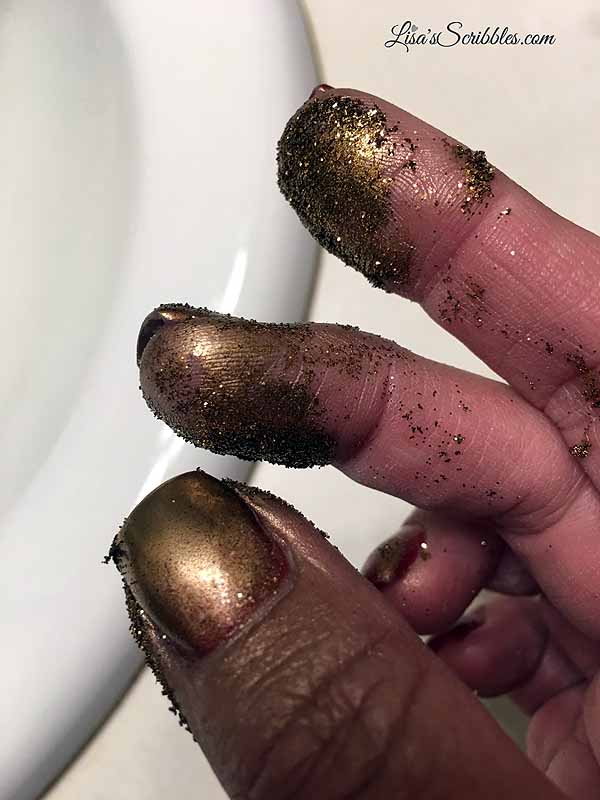
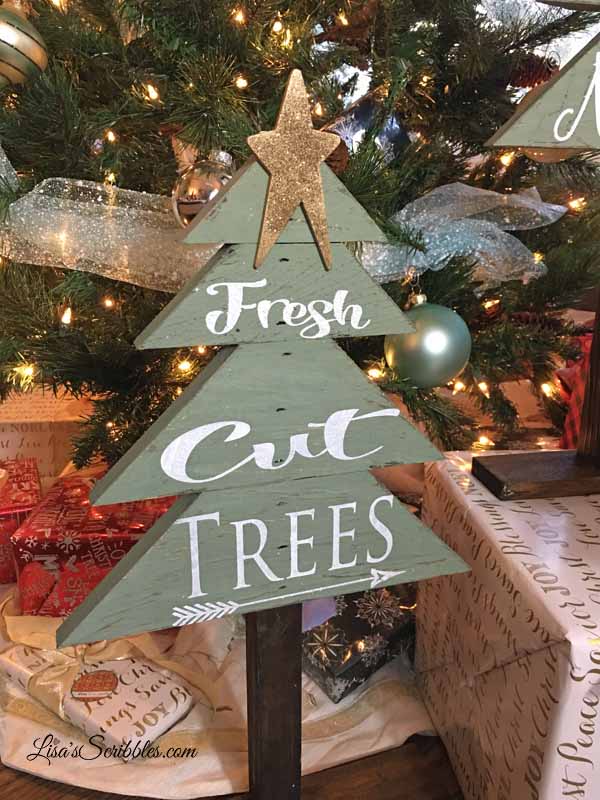
I also decided to add a wood star to the top of it and painted it gold. Little did I know that the bottle of glitter would explode and I’d be covered in it. lol

And little did I know that it would only take 5-minutes for little Miss Taylor Tot to hit the tree with her tail and break off a star…but have no worries, all is well and fixed. 

Fresh cut trees is rocking the star.

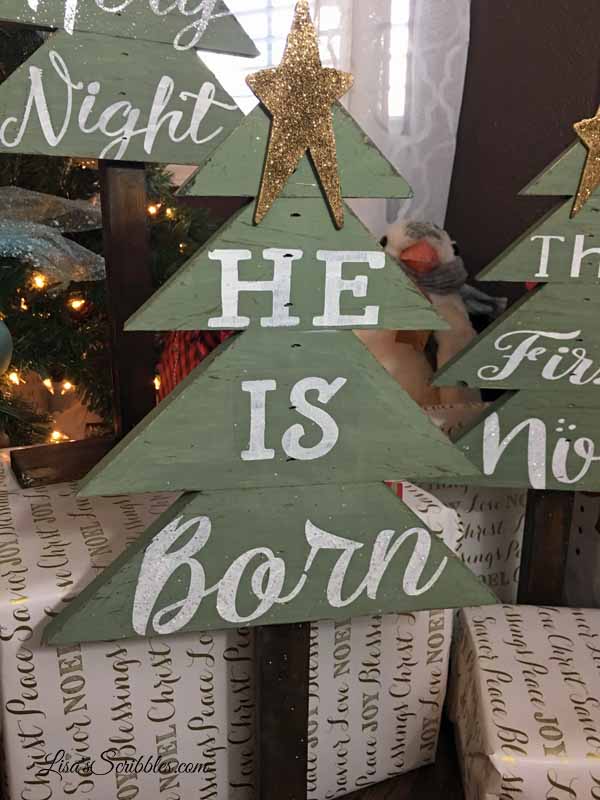
And He Is Born looks good with a little shimmering glitter.

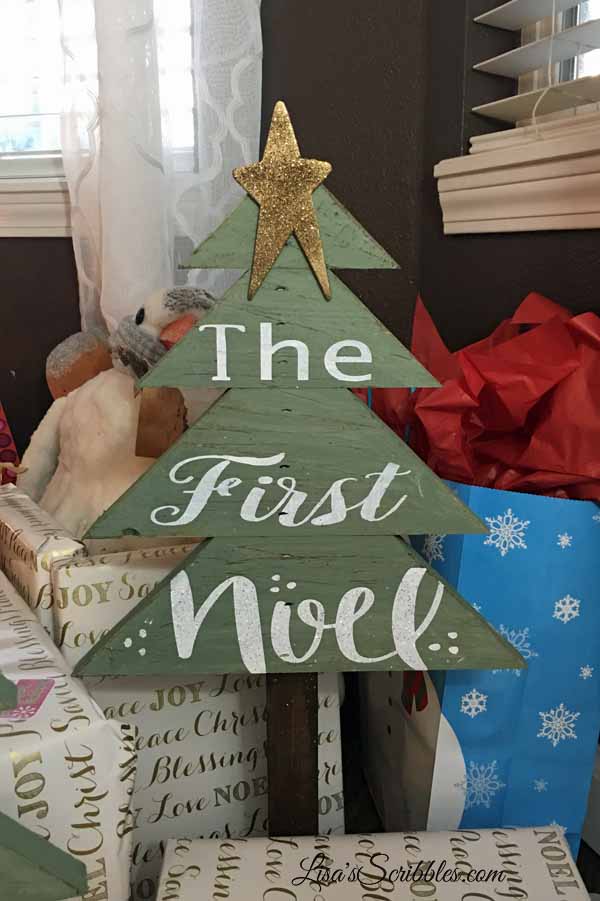
And The First Noel? Sparkle, sparkle, sparkle.

I’m also thinking ‘O Holy Night looks good in a little silver.

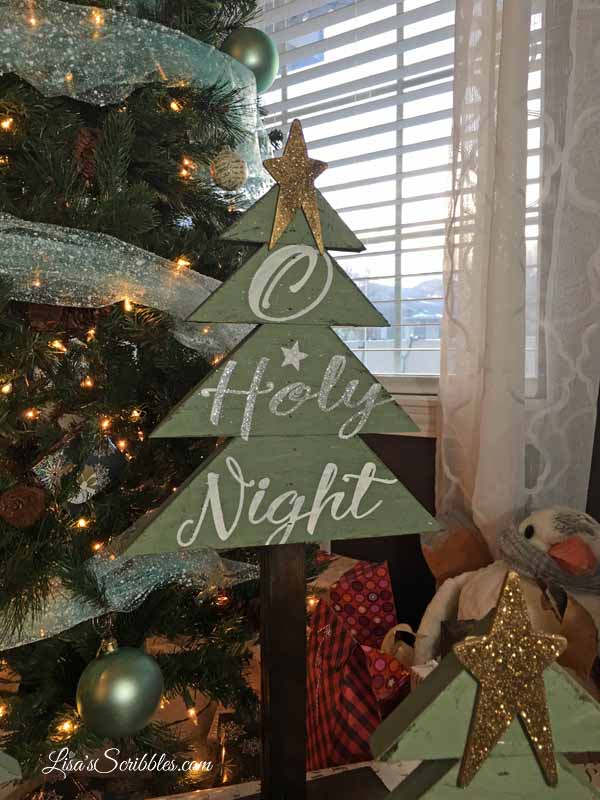
A little glitter to make the season bright…yup, I like how they turned out. Don’t you? Another easy, peasy DIY Rustic Christmas decor item to add to your list. I know the list of people wanting one from me is quickly growing. 

And guess what’s coming your way tomorrow?

Until the next blog post… Toodles!

Project of the Day: The Cody Shrine

I’m a little behind in my posts, I know, but I have been busy converting my blogs and website into one sleek new package thus making it easier for fans to find me. You know, everything in one location…

So since I’m a little behind in posting, I thought I’d show you the Cody Shrine from my youngest graduation party…at the end of May. Continue reading

Project of the day – Ana White’s Fancy X Desk

“We have a problem,” said my youngest, Cody. “Everyone has a desk except for me.” And he was right.

Watch for this remodel project,
staining laminate cabinets.

You see, I have a lovely home office that I custom made with left over cabinets from a former client’s showroom. They were downsizing, and I needed an office with built-in’s to get the most space and the most workstations possible. At the time, having three work spaces were perfect. I had a spot, the hubby had a spot, and I had a craft area because the boys never wanted to use the third desk space. Win, win all the way around for me…until someone moved back home and decided to attend college while living at home. We won’t name names here, oldest son, but when he moved back in I lost my crafting space. This also meant that if Cody wanted a desk, there was no space to be found…at least in the office.

So Cody and I began a search this summer to find plans to make his own desk for his bedroom. Now, there were certain things that he was requesting, first that it wouldn’t be too deep, he didn’t want to have to crawl over his desk to get into bed. Second it had to be a little modern, none of this peeling paint or my beat up trash finds. And third, it had to be long enough to house not only his computer, but his gaming TV as well. Nothing I couldn’t handle, right?

Our first plan of action was to search Pinterest together where we found desk plans from Ana White. Second plan of action was to figure out when since I was all consumed with my Wanna Be Remodel. Well, I finally found time and finished up Cody’s Fancy X Desk. I gave it a sleek coat of black paint and called it perfect!

I could go into how it was done, but why reinvent the wheel when Ana White already gives you the step by step plans here. So click away and feel inspired. Not only do I pin the pins on Pinterest, but I make them as well and sometimes they turn out just right.

What’s up next you ask? This little beauty is also in Cody’s room, used to house his TV and gaming counsel. I think it’s in need of a remake, don’t you?

DIY Wood Christmas Projects


A few weeks ago I started compiling projects that I wanted to do for Christmas. I perused Pinterest and got some ideas. My dilemma was that I had a ton of extra wood material left over from theĀ Pergola/deck remodel from this past summer, wood that I didn’t want to go to waste mostly because it had already aged itself properly.

First I took this pin of DIY block letters and ran with it on my own terms, as always. I cut the wood to my dimensions (started with a 4x6x12 piece of lumber), painted them with a coat of white paint, aged them using a mixture of brown paint and water (then wiped it off), and finally went in search of some printable letters. DIY Swank was great, and when I printed my letters, I converted the file to PDF and printed at 50% of the original size. I did a few test runs first to make sure they’d fit the size blocks I’d cut. I then cut them out of the paper (with the hubby’s help) and used Mod Podge (matte finish) to adhere them to the blocks. I did a few coats to make sure they stayed on well. Then I got the fun idea of adding “sparkles” to the blocks too! I loved how they turned out.

Glenn was a huge help cutting the wood.
My letter blocks all cut to size.
Added a coat of white paint to them first before I aged them.
I had set the letters out to see where I wanted to place them.
When I came back, here’s what I found…boys!
I think the sparkles make all the difference.


Another idea came from some wooden planter boxes I’d seen posted on Pinterest. Now while I didn’t need any planters, I did come up with the idea to create some wooden trays that could be used year round either inside or out for decor. I used a wood tray I already had as inspiration as well. And since my mom’s birthday was right before Thanksgiving, I made her a few as well.


This was the first coat of paint before I aged them and added handles.
My mom took the red set.


This additional tray is smaller than the first and doesn’t have
metal handles, only because I didn’t have any lying around.

So the final project from leftover wood I had was making wooden picture holders. Again, I got the idea from Pinterest, from Shanty 2 Chic. They used 2×6 lumber, but I chose to use leftover pallet posts (2.5 x 2.5) from a recent remodel at my parents house. You could also use a 4×4 post for added depth. Again I took their printable’s and reduced them to fit my project. I painted them red and green, then antiqued them with black paint. I used upholstery tacs to hold the wording phrases in place, and curly ornament hooks to hold the pictures.

Now, with all this work done I didn’t spend more than $7.00 for additional materials (Mod Podge and some curly ornament hooks). I used up some wood from my pile, printed on paper I already had, and painted with paint in the cupboard. I think all in all they turned out pretty nicely. Even Glenn said that they turned out better than he had thought they would…gotta love the non-visionaries!