Category Archives: DIY

DIY Christmas – Glass Ornament Decoupage

So I’m at it again, this time it’s glass ornaments I’ve had lying around forever. A few years back I found a pin on Pinterest showing old book pages being decoupaged to glass ornaments and I thought that would be pretty cool…until I tried it. In theory, it should have worked, but in reality it didn’t. Why? The old book pages were too thick to adhere to the glass bulb, so I tossed the idea aside until recently when I was cleaning out a cabinet in my office and came across the ornaments again. An idea struck me and that’s where it all started.

To begin with I gathered up the remaining glass ornaments.


Christmas ornaments013

Then the supplies of decoupage glue, tissue paper and glitter of course. 

Christmas ornaments014


Christmas ornaments012


Christmas ornaments015

I cut my tissue paper into strips and then into smaller squares or rectangles. 

Christmas ornaments017

I then pulled the ornament hanger clip off and found a straw to help hold it upright while I coated the glass bulb with the decoupage glue. FYI – your fingers will get coated with the glue and glitter. 

Christmas ornaments020


Christmas ornaments022

Once the bulb was completely coated, I then applied strips of the tissue paper randomly over the surface ensuring it was completely covered. You will overlap the tissue, it’s all good in the end, I promise. 

Christmas ornaments023

As I applied the tissue paper I spread more of the decoupage over the tissue paper to smooth it down. 

Christmas ornaments024

Once it was completely covered in the tissue paper, I then sprinkled on some glitter because everyone needs a little bling in their life! Okay, besides needing bling in your life, I did it so it would sparkle when the Christmas tree lights and sunlight hit them. 

Christmas ornaments016

Once dry, I then reattached the ornament hanging clip to the top and smiled at my creation. 

Christmas ornaments031

Pretty cute, right?

Christmas ornaments028


Christmas ornaments027


Christmas ornaments029

And how do they look on the tree? Well, you tell me… 

Christmas ornaments010


Christmas ornaments009


Christmas ornaments032


Christmas ornaments006

I liked them so much I grabbed some mini silver ornaments I’d used in the past and decoupaged them too!

Christmas ornaments008

Some made it to the tree while others became table top ornament decorations.

Christmas ornaments007


Christmas ornaments001


Christmas ornaments002


Christmas ornaments003


Christmas ornaments005

Makes you want to repurpose some of your old ornaments, doesn’t it? 

Toodles!


DIY Christmas – Custom Decor Candles

Want to give your friend or family member that special gift that comes from the heart? Well, I got another idea for you to run with for your DIY Christmas – A Custom Decor Candle. Yeah, I know Scentsy is the big thing now, everything wickless, but sometimes your want to have a candle to add to your decor because it’s simply so beautiful. I have an easy way to either update your old candles, or create a magical gift for the family and friends in your life. 

candle-creations026

So I made these little beauties at the same time as I was Upcycling glass jars for Christmas gifts. I used some of the same supplies; ribbons, embellishments, old earrings and some upholstery tacks.

candle-creations041

I started with some candles I purchased at Walmart. The large ones are scented, the smaller are unscented. Hobby Lobby had candles as well, but I was looking for the least expensive variety.

candle-creations040

I gathered together my supplies.
candle-creations039

Ribbons, tacks, some jewelry making supplies. 

candle-creations008

A few things from the paper crafting aisle as well.

candle-creations038

Cuz seriously, who doesn’t want some bling in their life?

candle-creations012

I then used the ribbon of choice and secured in the back with some upholstery tacks. They add a nice touch too, don’t you think?

candle-creations017

After securing the ribbon, I embellished with a variety of my supplies.

candle-creations025

A little paper crafting supplies with the flowers that I attached using a glue gun, and then some bling to dress it up.

candle-creations032

I used a tack on the front to hold the tassel and key in place for this one. 

candle-creations028

And this got a little of everything.

candle-creations019

And then I decided to mix things up by using some wire.

candle-creations018

After adding a little bit of jewelry to the front, I secured it by twisting the wire on the back.

candle-creations030


candle-creations023

A little bling, a little ribbon and wa-lah! You’ve got yourself a beautiful handmade gift that will be cherished. 

candle-creations016


candle-creations015


candle-creations014

This little embellishment was an old earring from my niece that I added the charm to.

candle-creations020


candle-creations011


candle-creations029

Now who wouldn’t want to display them on a shelf or tray in the bathroom? Or even in the living room or dining room. 

candle-creations027

Yeah, I’m gifting these away this year. So if you’re family/friends and you’re seeing this post, guess what’s coming your way!

Toodles!


DIY Christmas – Upcycling Glass Jars

In December 2013 I published a post title DIY Christmas – Candy Jars, and recently the post and comments have taken off from sites like Hometalk and Pinterest. So, in an effort to keep things rolling, I’ve updated my DIY Christmas post to include gift ideas for all those glass jars once again. And boy oh boy are you in for a treat!

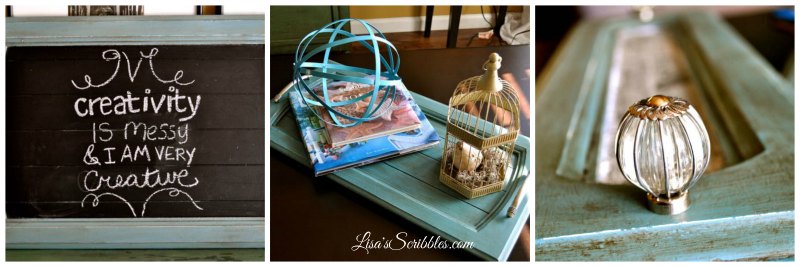
I collect things, what can I say? Now let me point out that I only collect things that inspire me, something I can reuse, repurpose into something different, an original creation/variation of sorts. Upcycling has become big, there are so many things you can do with old wood, glass jars, sweaters and the list keeps growing. It’s all about creating something unique and beautiful at the same time. My husband used to call it junk, but not so much anymore. Now? Now he’s like, “So what can we make this weekend so you can blog about it?” Crazy, right? 

So since he’s been working super long hours this week, I’ve been upcycling glass jars for Christmas gifts and wanted to pass the inspiration on to you.

Glass Jar Upcycing027

Well it all started with empty jars ranging from spaghetti jars, hot peppers, sauces, spice jars and a few drink jars thrown in just for the heck of it. And what came out of them is pretty awesome!

Glass Jar Upcycing001

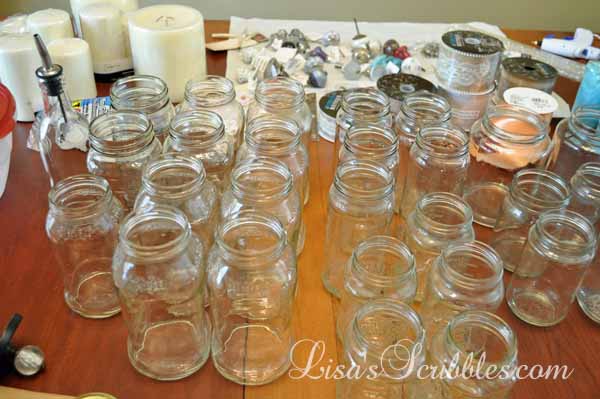
You think I had enough jars saved up? It was becoming a problem on finding space to store them without my hubby finding them and want to toss them.

Glass Jar Upcycing003

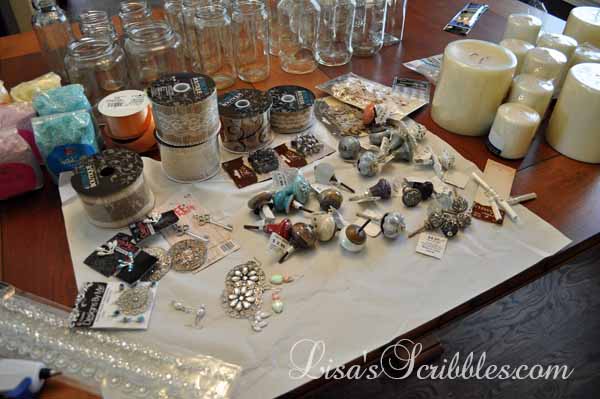
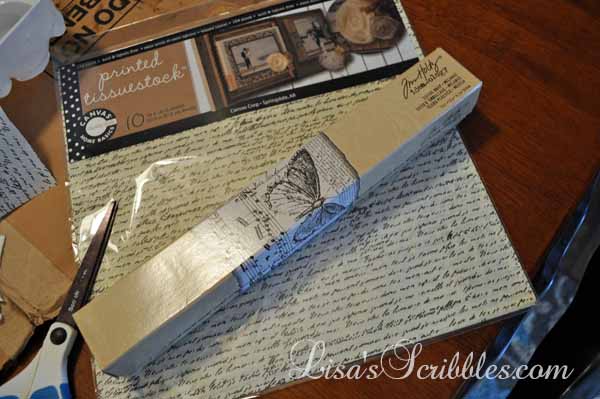
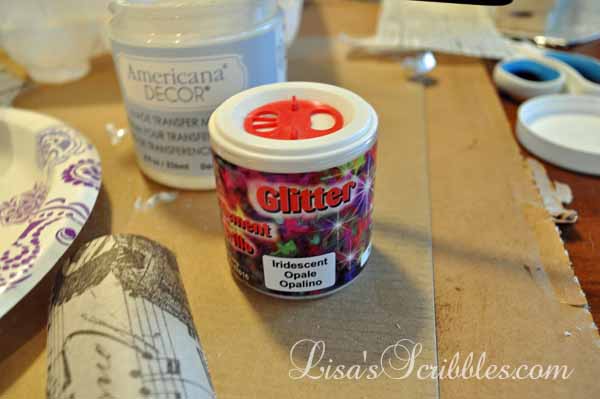
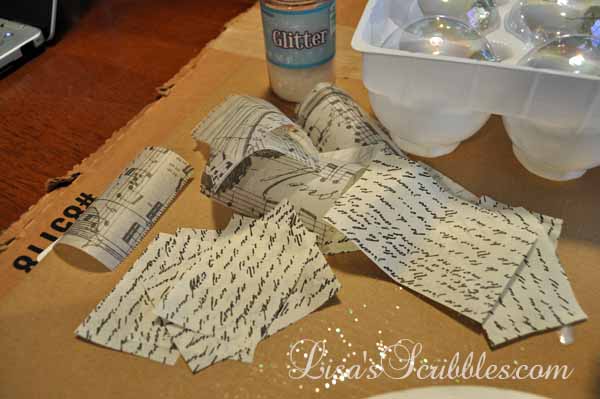
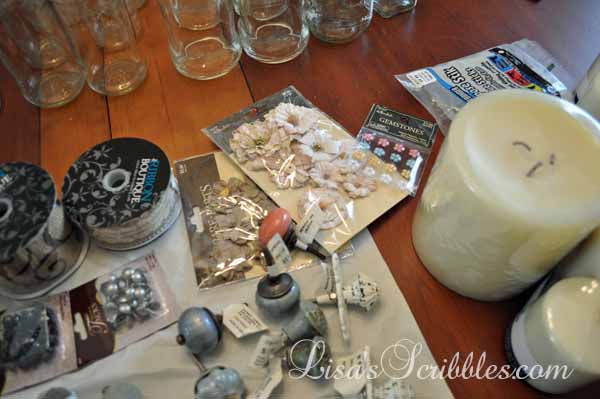
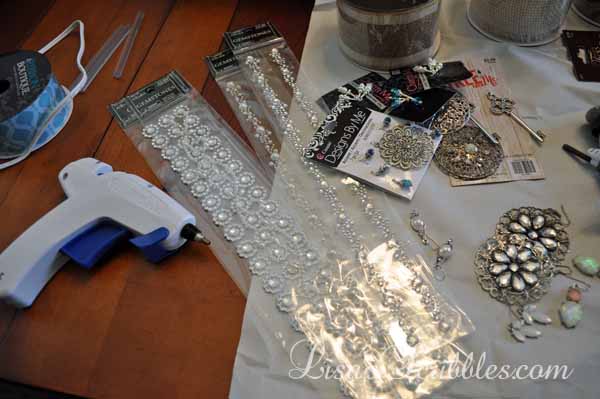
I gathered up my supplies; ribbons, embellishments, knobs, and some paper crafting supplies. 

Glass Jar Upcycing004

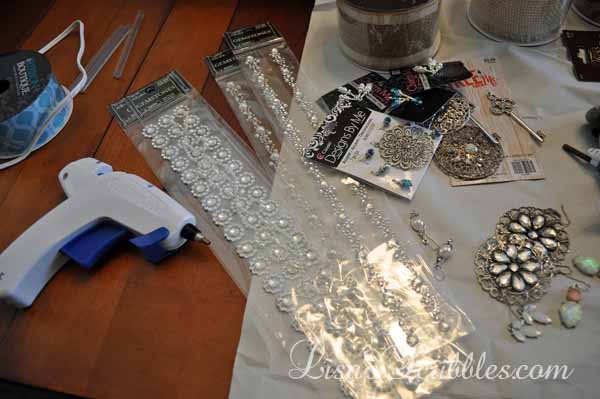
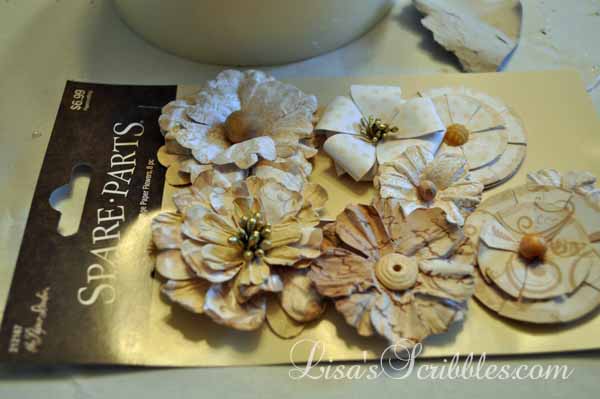
Those lovely little do dads were in the paper crafting supplies area at Hobby Lobby It’s the bling that caught my eye.

Glass Jar Upcycing005

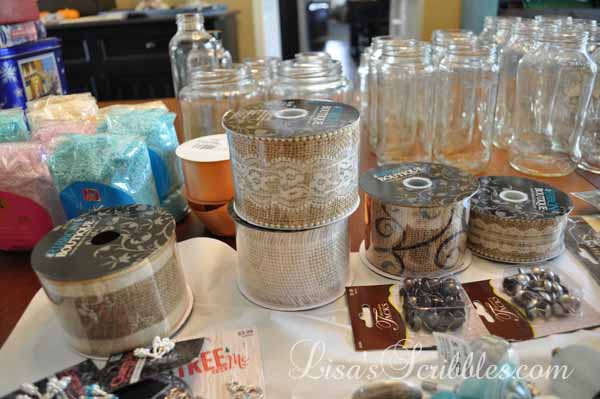
Hobby Lobby had their ribbon at 50% off, can’t beat a deal like that around holiday crafting time.

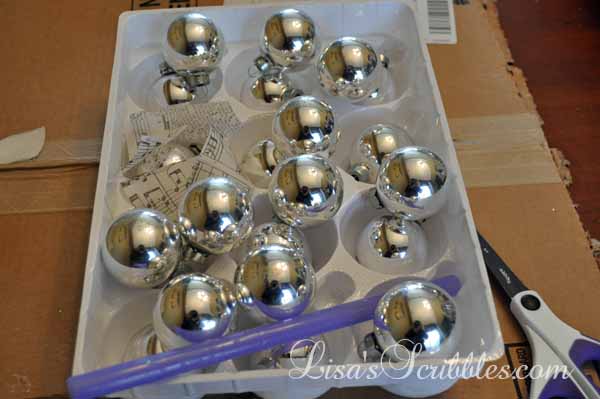
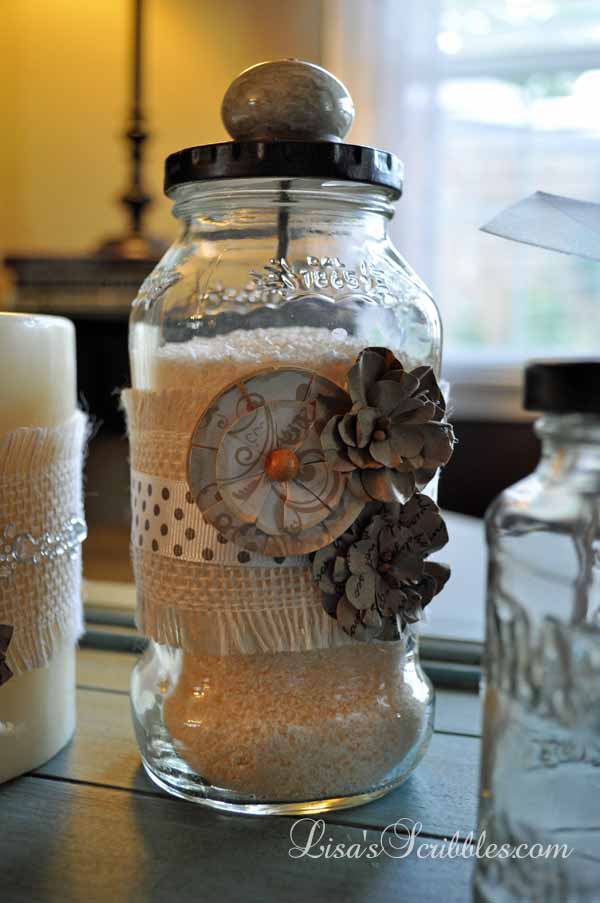
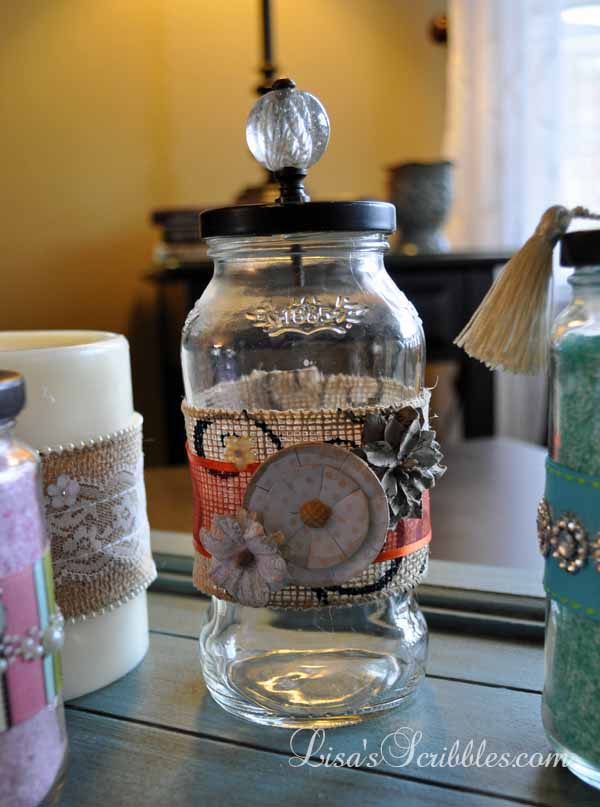
To start with I selected my jar, in this case it was from sauerkraut, and no it didn’t stink because I always run my jars through the dishwasher and then let them sit for a while without the lid on so the strong orders disappear. I also soak my jars for a little while in warm water to remove the labels. I’ve found that an SOS pad works great at removing the sticky residue quickly and doesn’t scratch it. And for the really sticky stuff? I use Goo Gone and let it soak for just a little bit before scrubbing them off.

Glass Jar Upcycing007

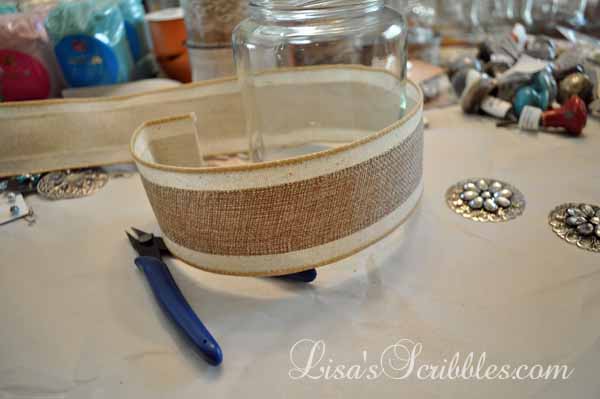
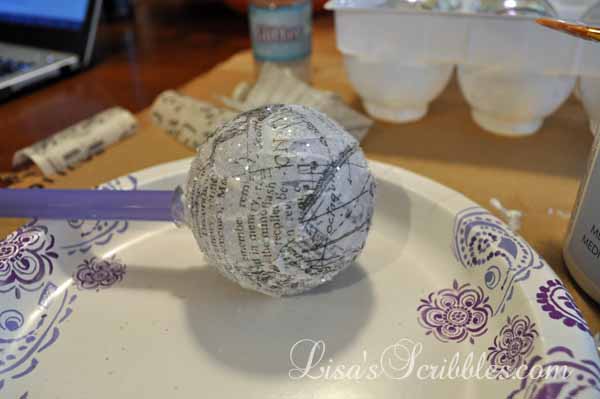
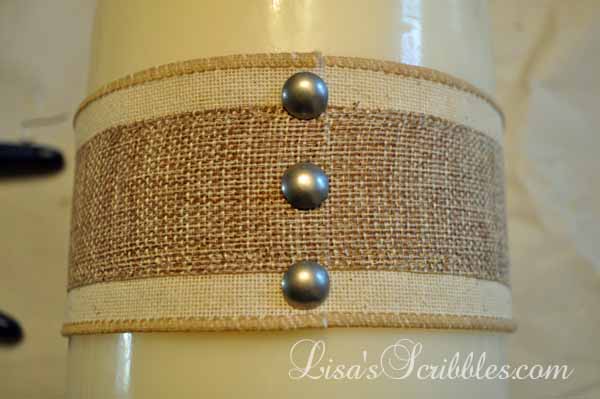
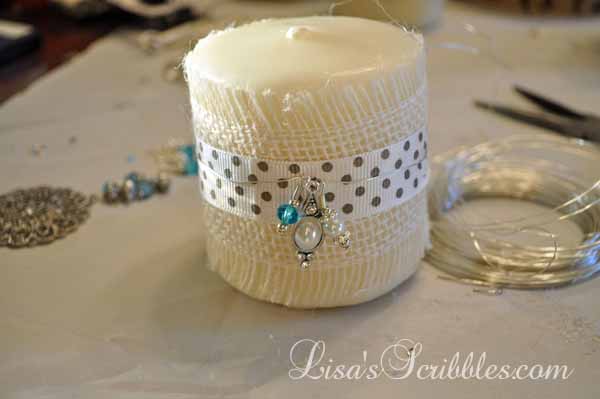
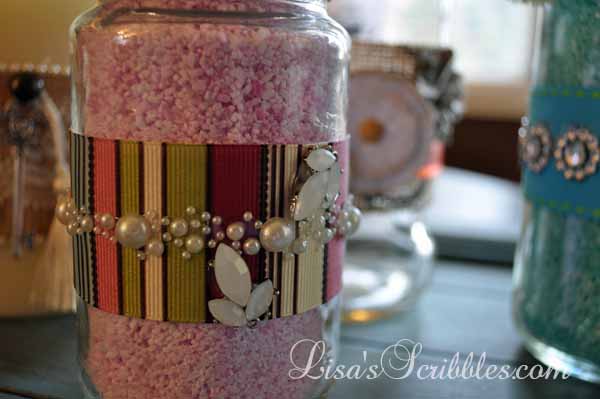
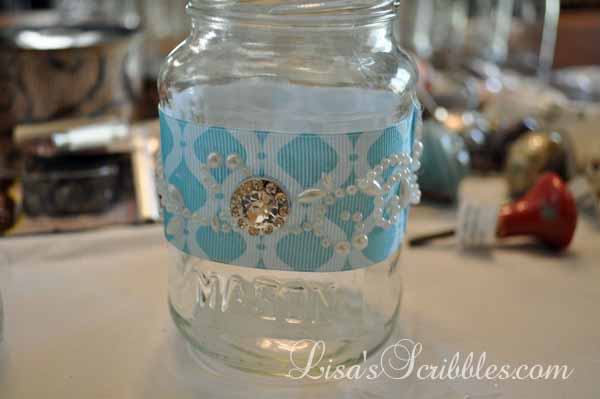
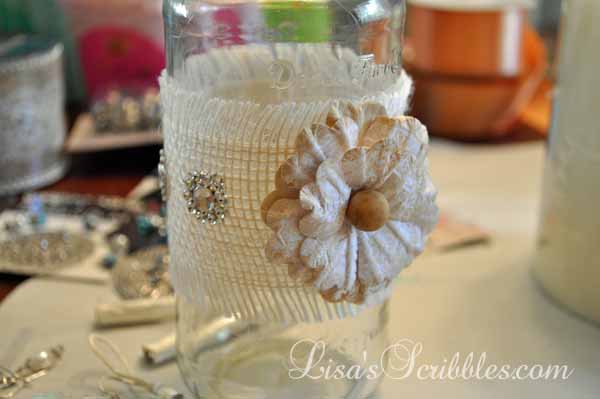
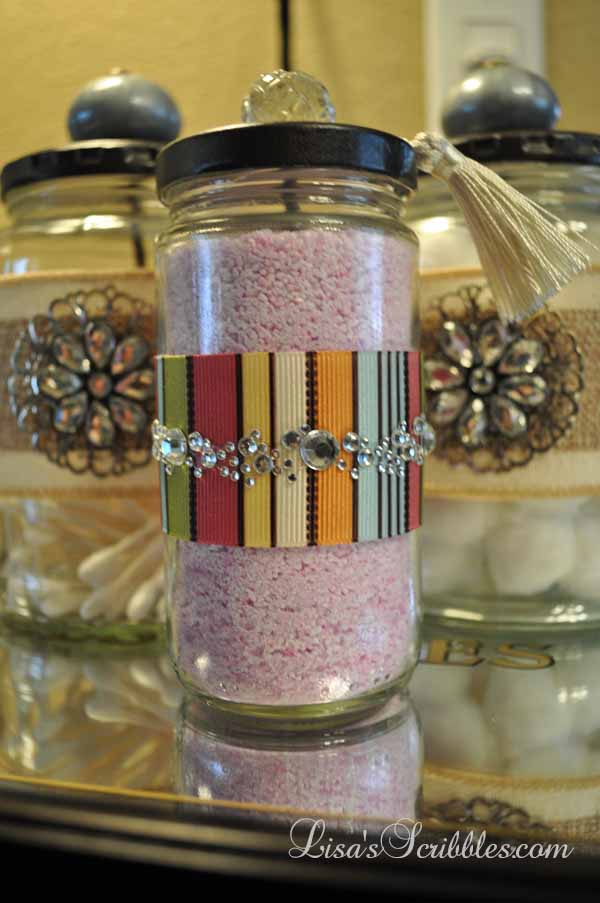
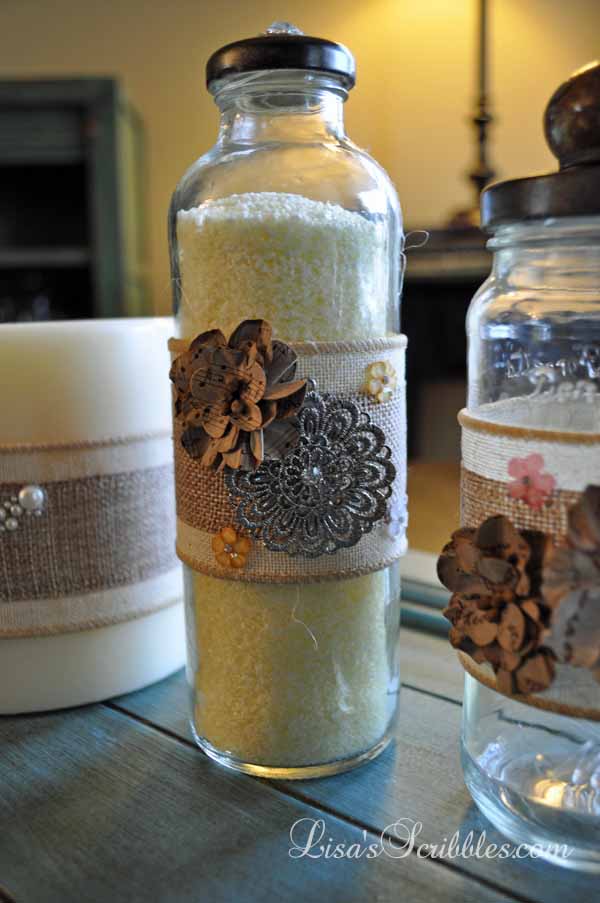
I picked my ribbon of choice and wound it around the jar securing it with hot glue.

Glass Jar Upcycing008

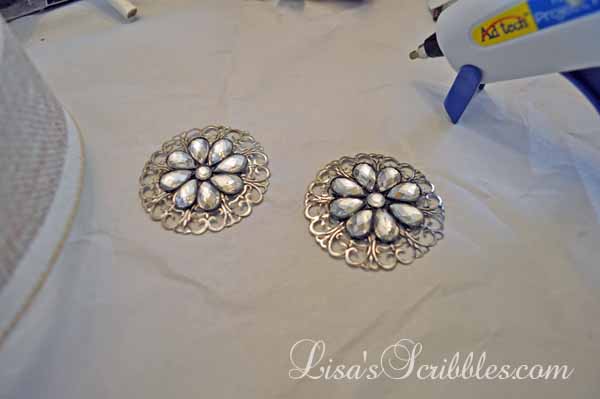
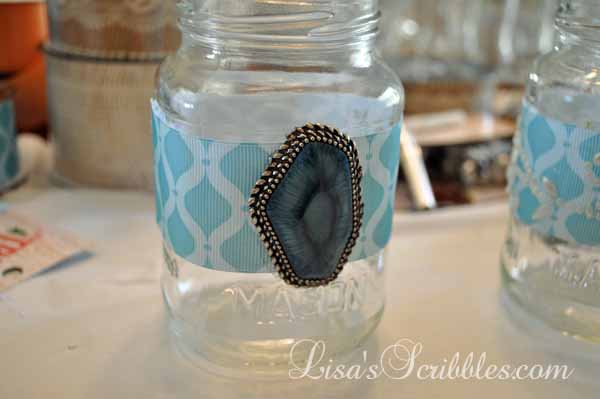
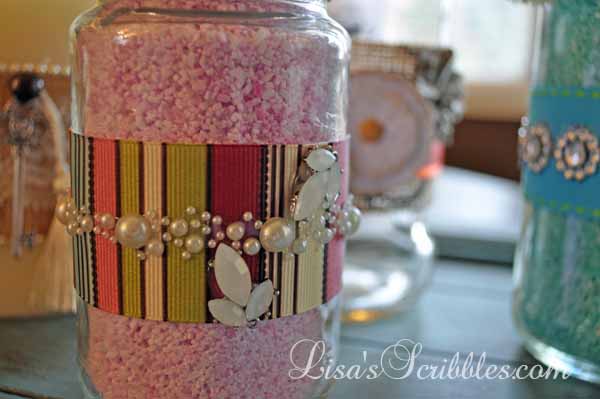
Those lovely embellishments? Those were from my niece, they were old earrings she no longer wore and didn’t want. Of course I knew exactly what I’d use them for and snagged a few others as well.

Glass Jar Upcycing009

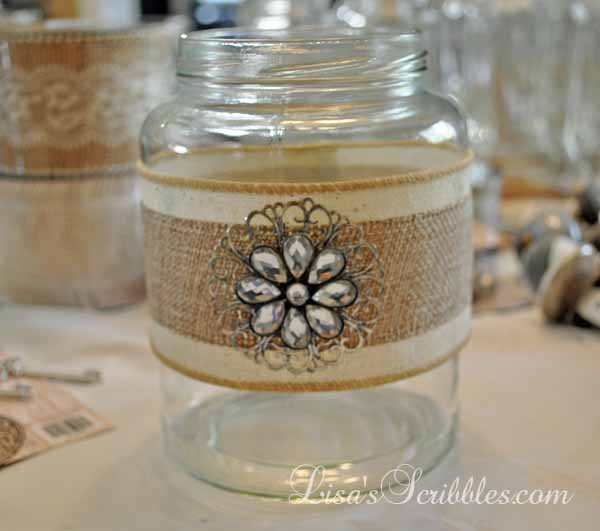
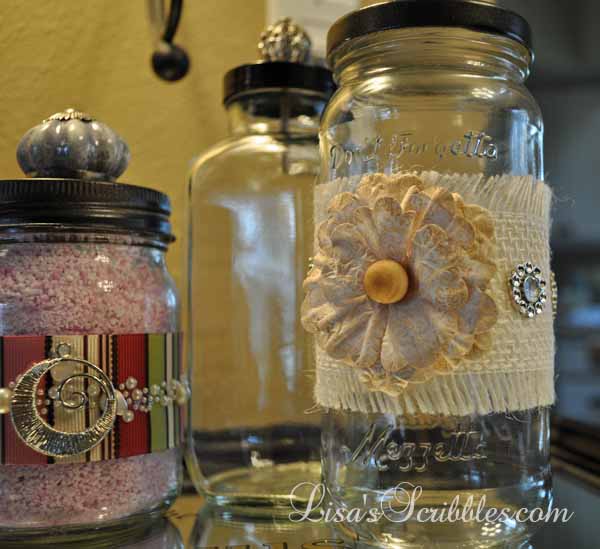
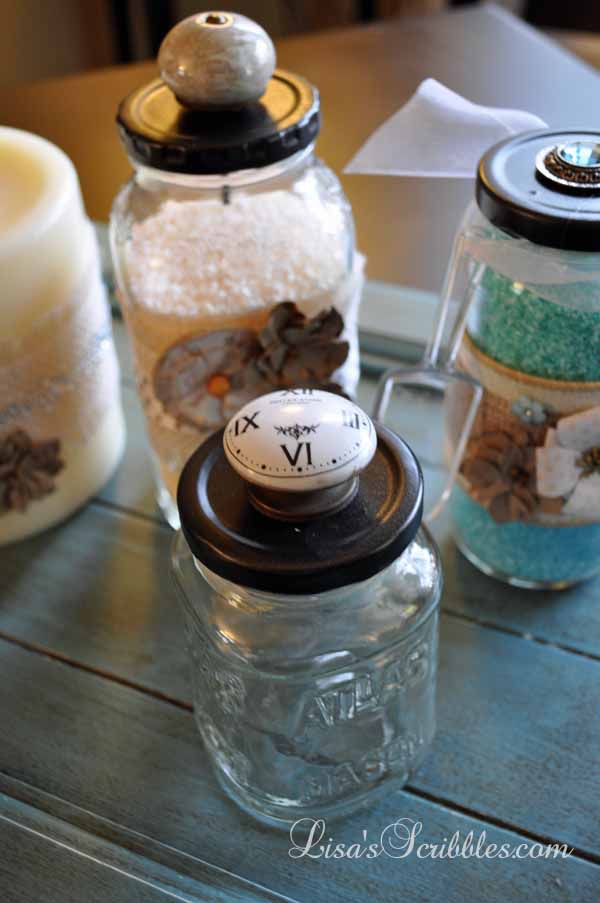
Cute right? Since I had two similar jars I embellished them the same way. I saw them sitting on a bathroom counter holding cotton balls and q-tips. 

Glass Jar Upcycing024

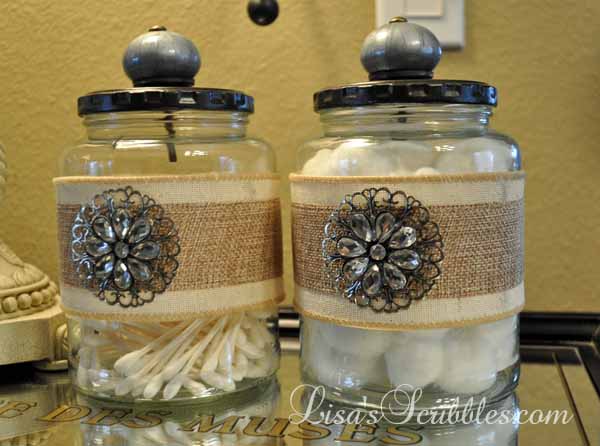
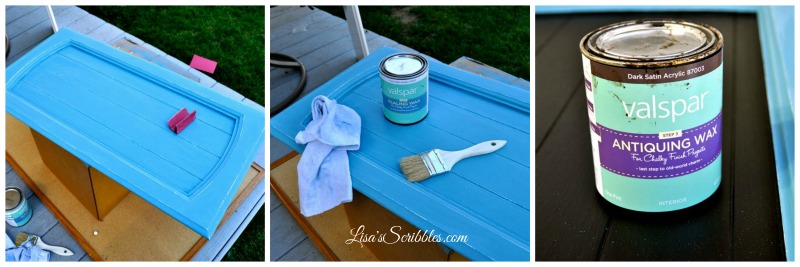
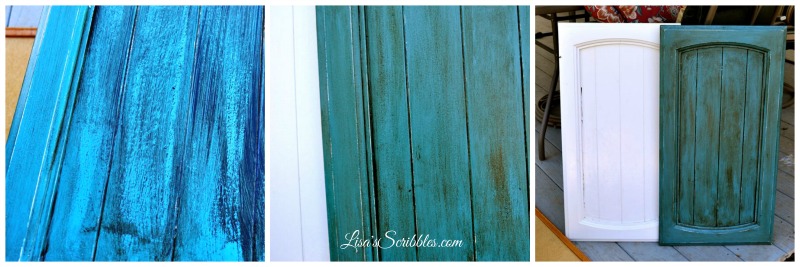
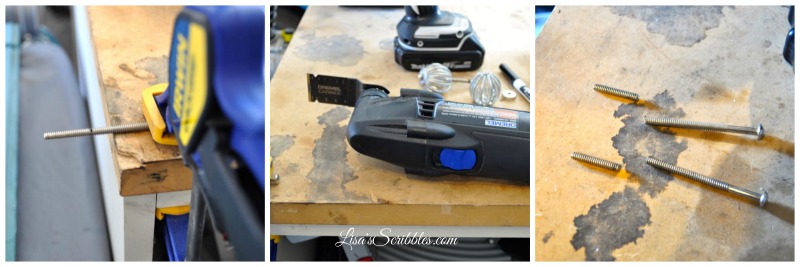
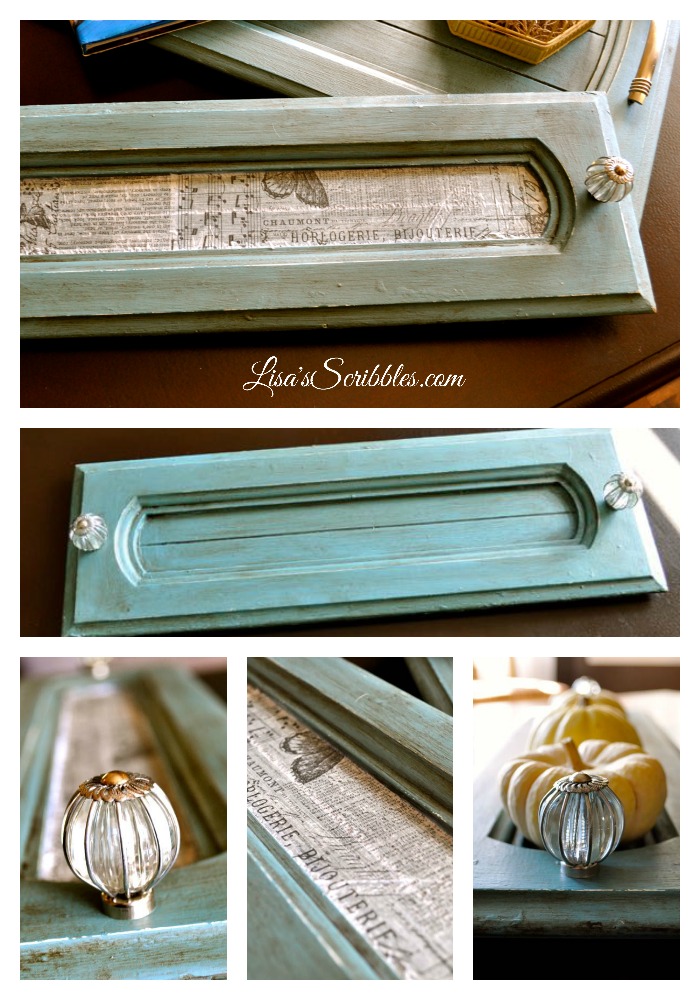
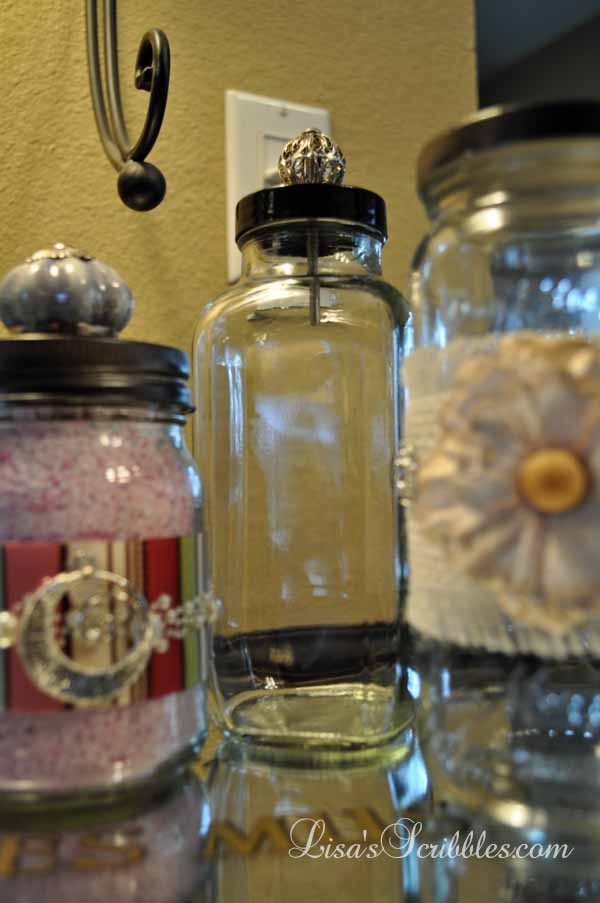
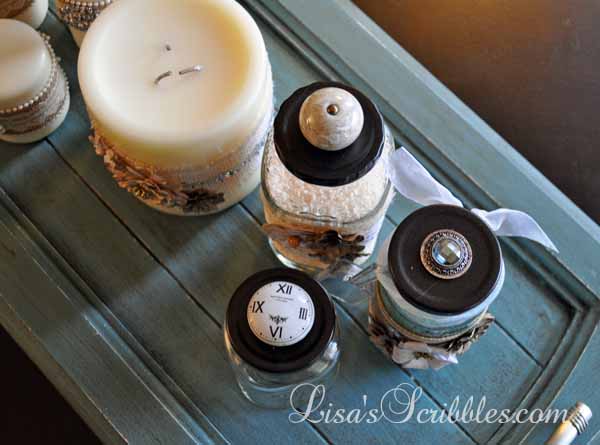
The next step was to drill the holes into the lids and then spray paint them. I thought I’d like to change up the colors this time around and did some white, silver and the oil rubbed bronze you see above, but in the end decided I like the oil rubbed bronze best.

Glass Jar Upcycing014

I also cut the screws down this time since I’d be handing them out as gifts.

Glass Jar Upcycing010

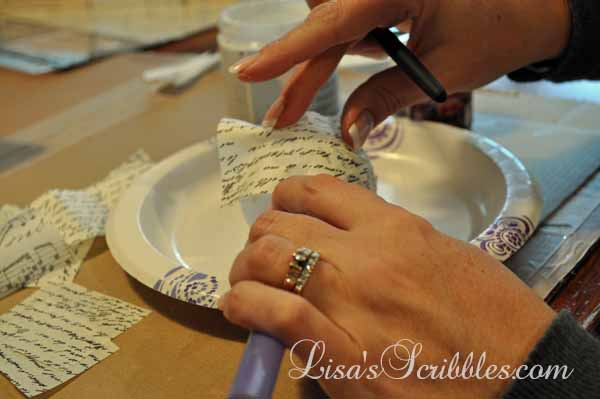
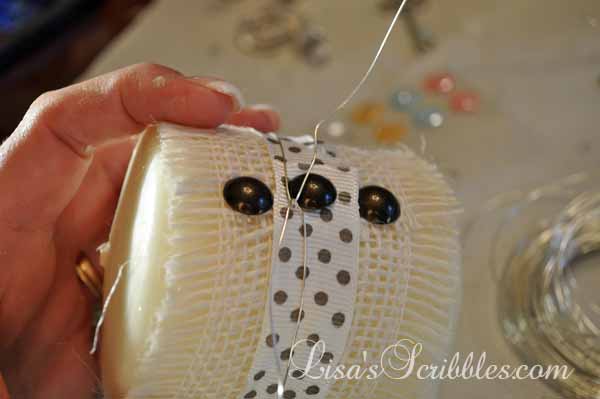
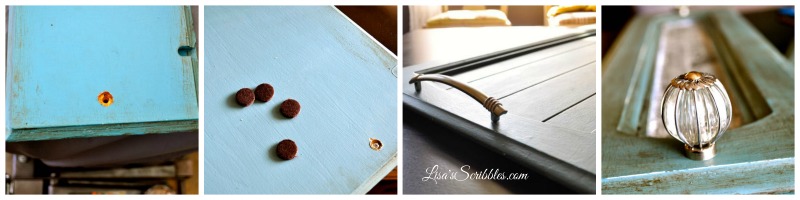
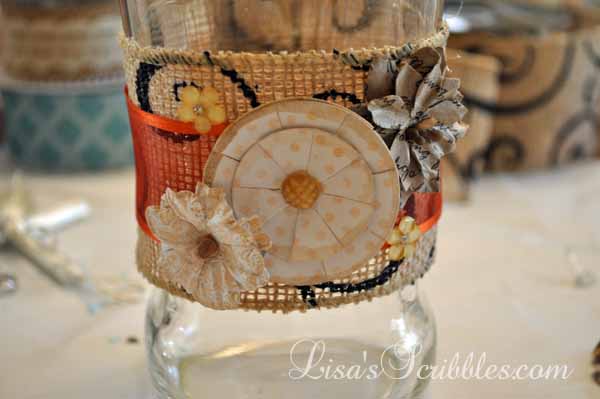
Here’s an example of how I attached the ribbons, a little glue on the starting piece, then a little along the way to keep it in place. The strip of glue wasn’t needed, just a little dot to secure it is all you need.

Glass Jar Upcycing011

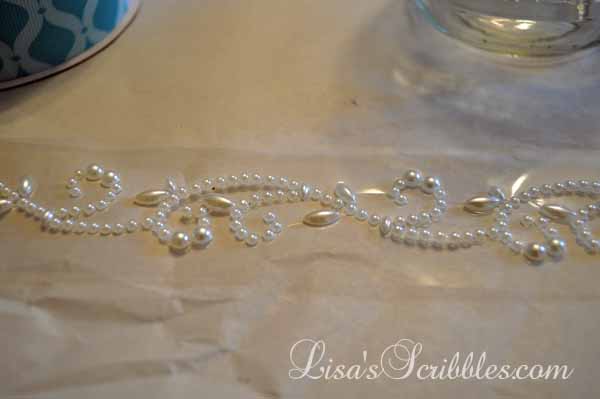
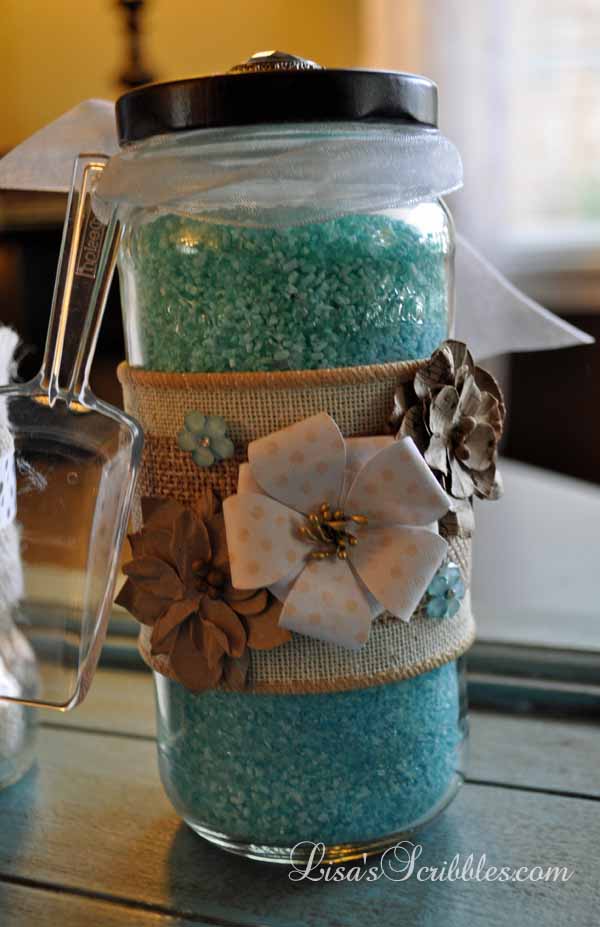
And these lovely embellishments from the paper crafting department at Hobby Lobby added a little bit of elegance to them as well.

Glass Jar Upcycing012


Glass Jar Upcycing013

Once I got started I couldn’t stop! 

Glass Jar Upcycing020

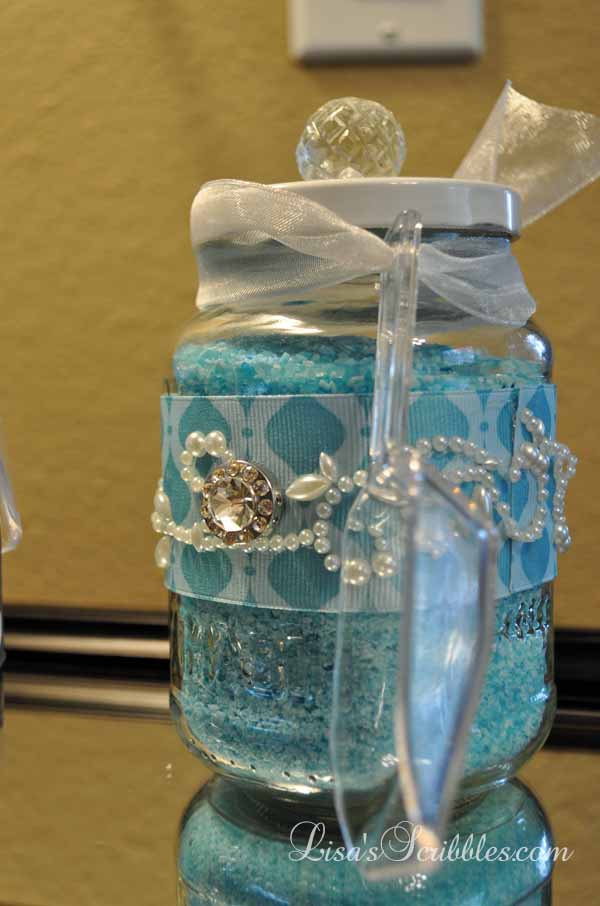
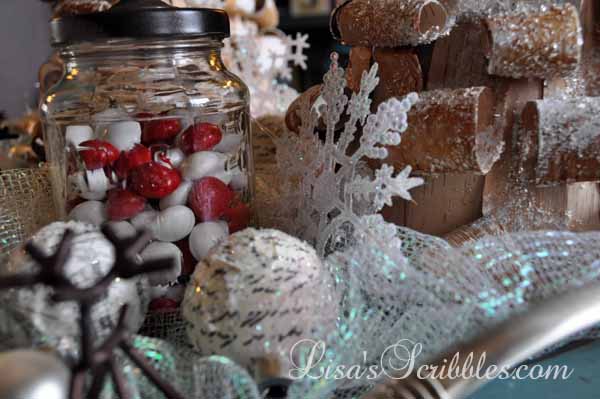
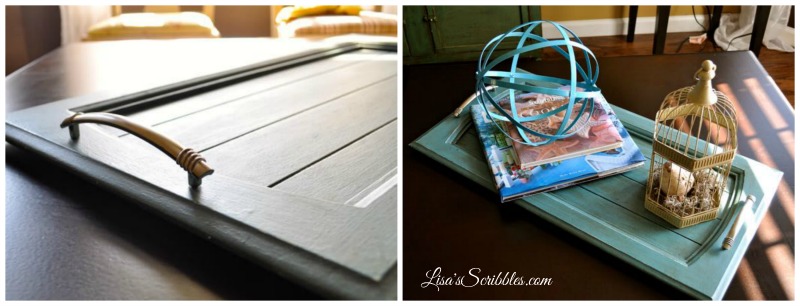
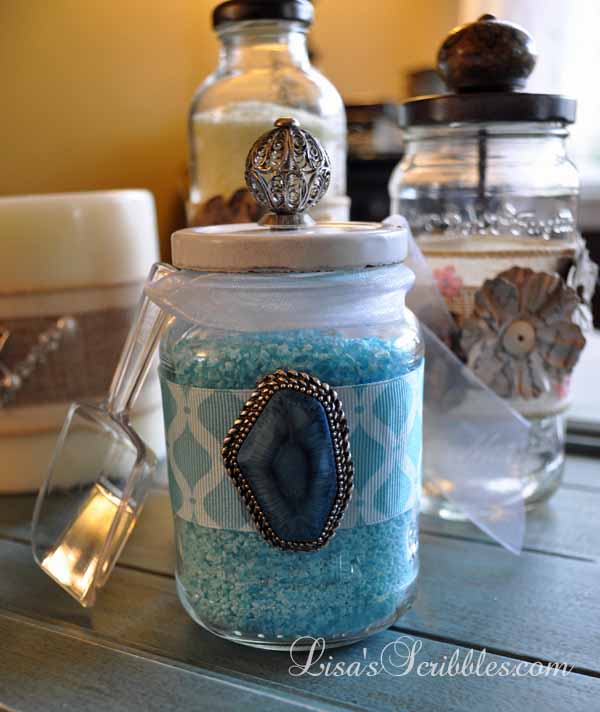
I filled mine with bath salts that I’d purchased a while ago and added the scoop to them.

Glass Jar Upcycing002

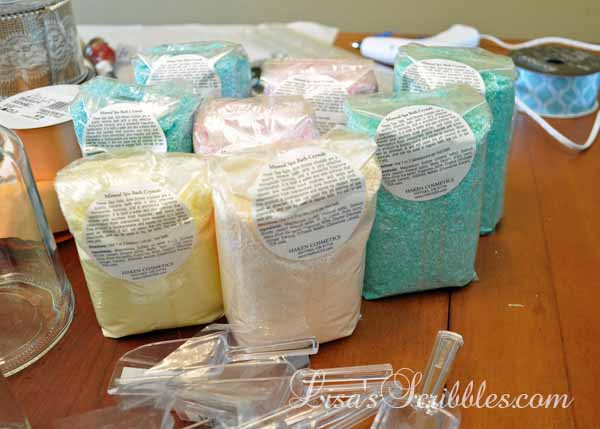
You could fill them with just about anything you wanted and give them away for Christmas gifts. Because who doesn’t want a homemade gift that’s simply beautiful? And might I add cheap to make too?

Glass Jar Upcycing016


Glass Jar Upcycing017


Glass Jar Upcycing018


Glass Jar Upcycing019


Glass Jar Upcycing022


Glass Jar Upcycing023


Glass Jar Upcycing025


Glass Jar Upcycing026


Glass Jar Upcycing027


Glass Jar Upcycing028


Glass Jar Upcycing029

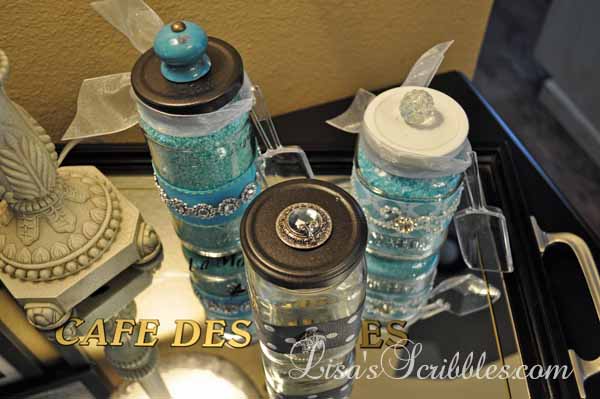
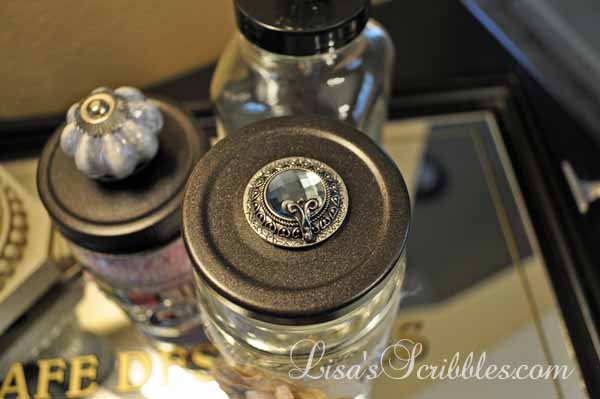
If you didn’t want to add a knob, you could also hot glue an embellishment on the top as well.

Glass Jar Upcycing031


Glass Jar Upcycing032


Glass Jar Upcycing033

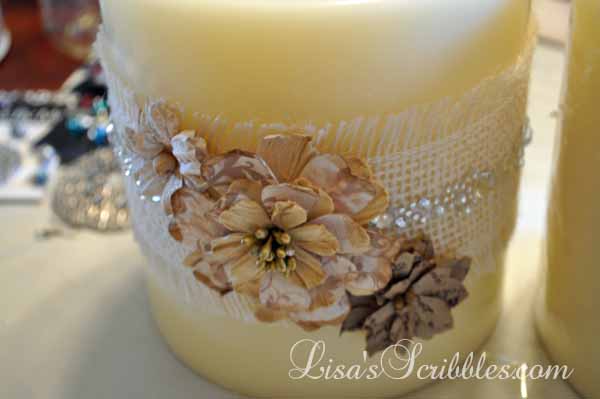
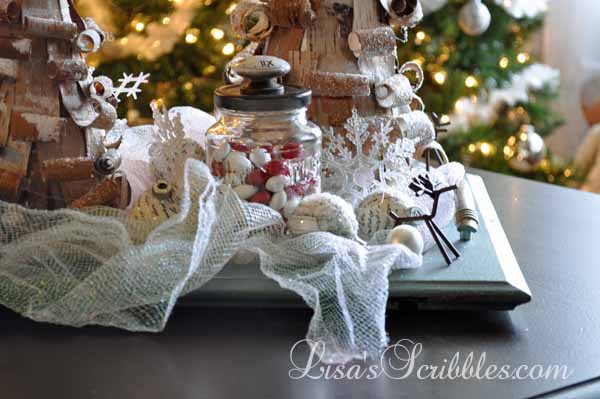
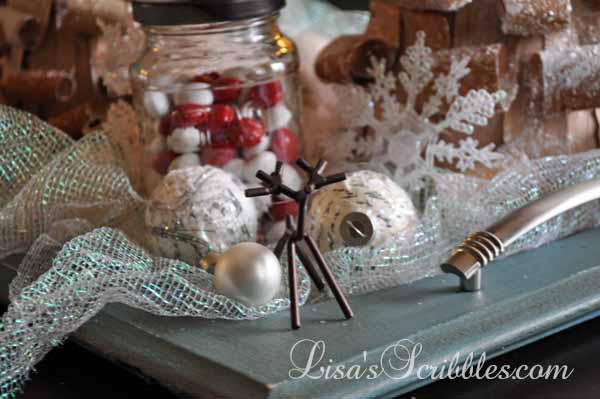
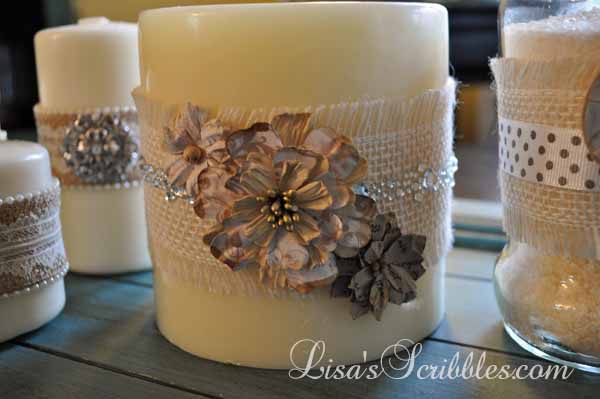
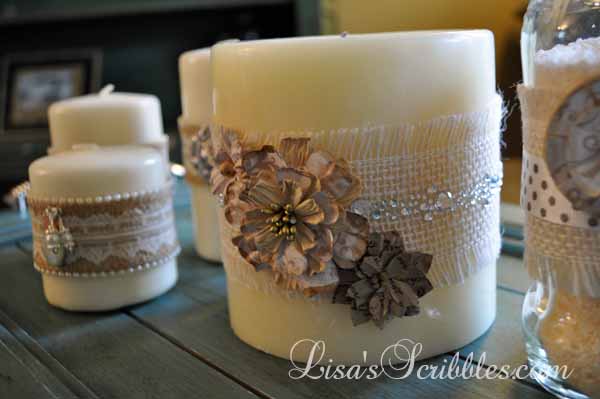
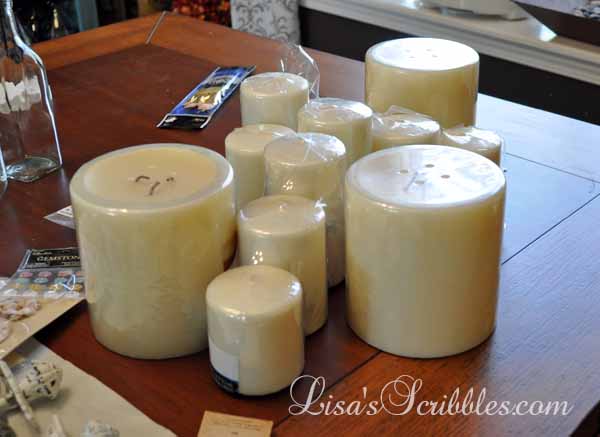
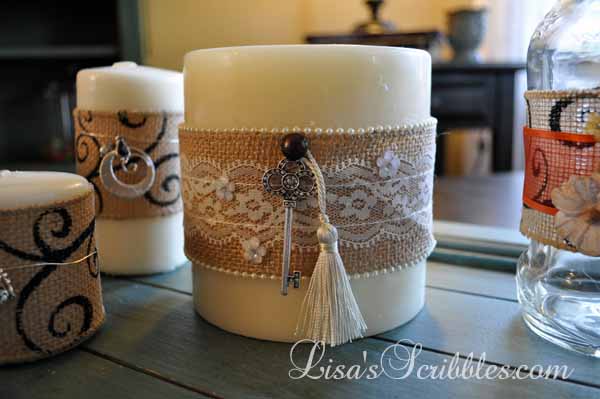
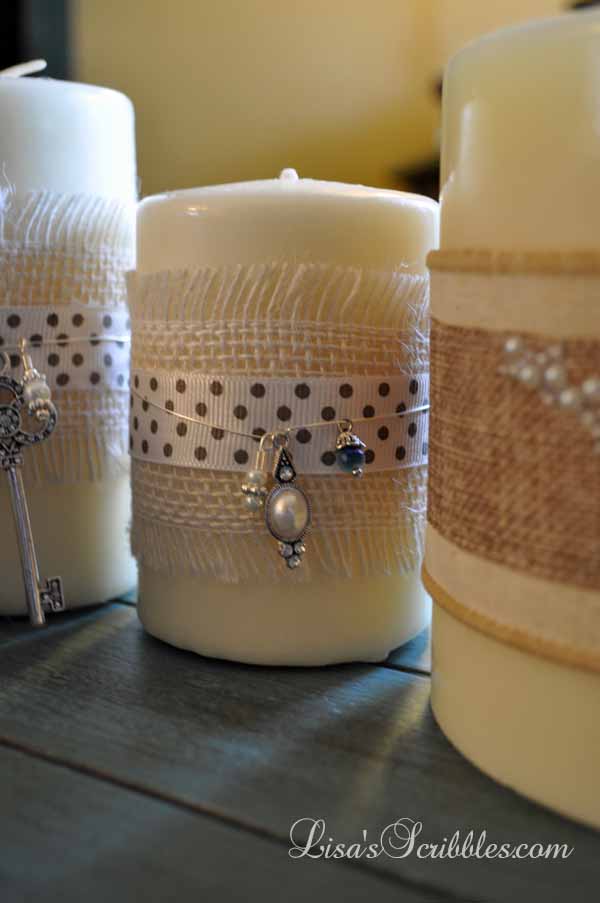
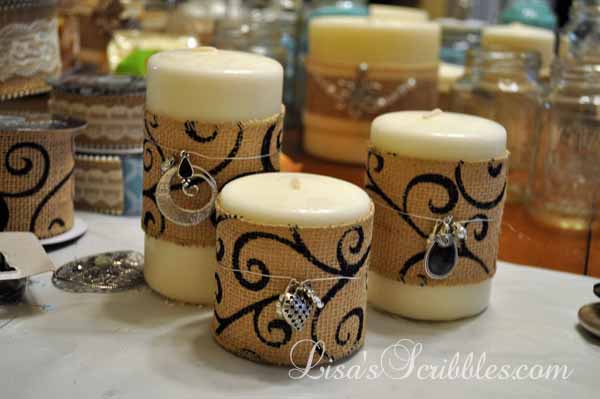
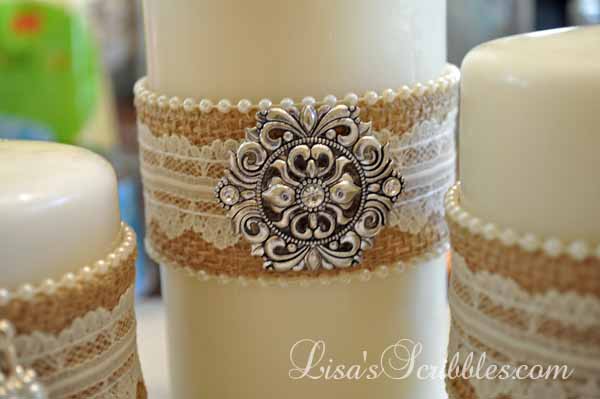
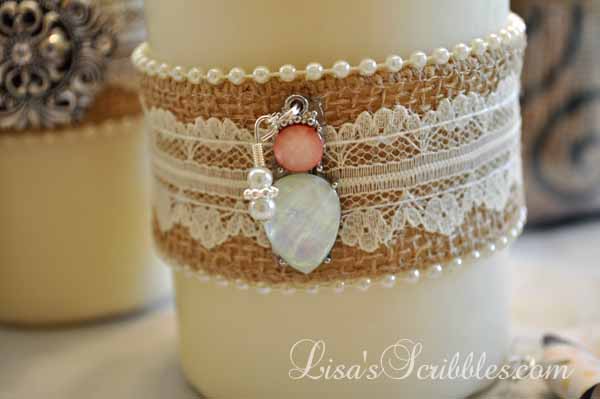
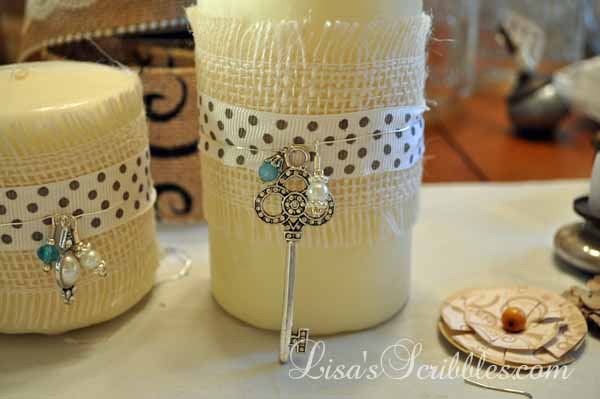
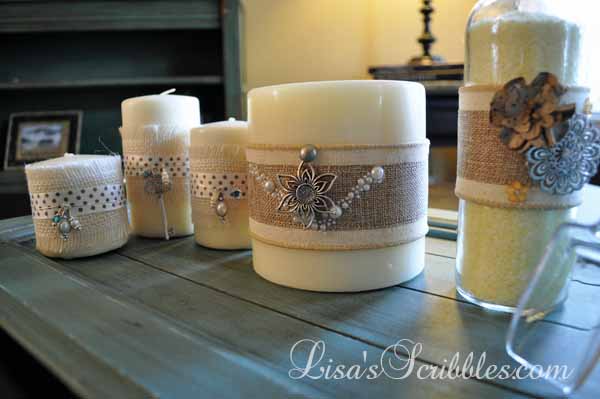
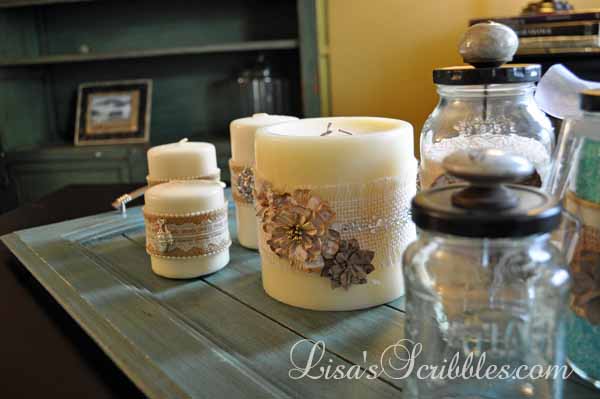
You notice those candles in the pic? That’s next week’s DIY Christmas blog post.

Glass Jar Upcycing035


Glass Jar Upcycing034


Glass Jar Upcycing037


Glass Jar Upcycing036


Glass Jar Upcycing038


Glass Jar Upcycing039


Glass Jar Upcycing040

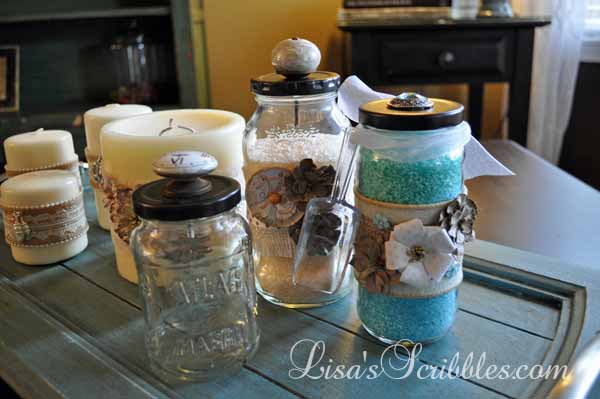
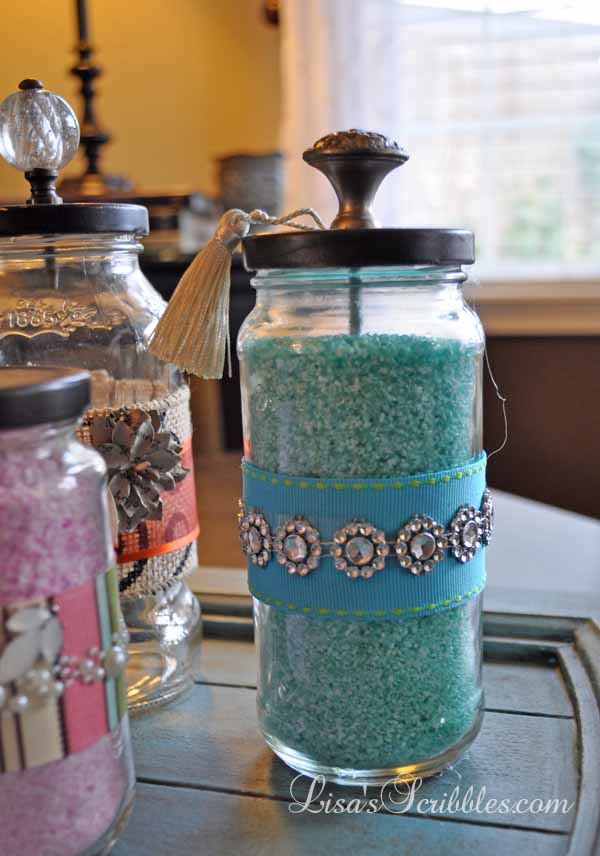
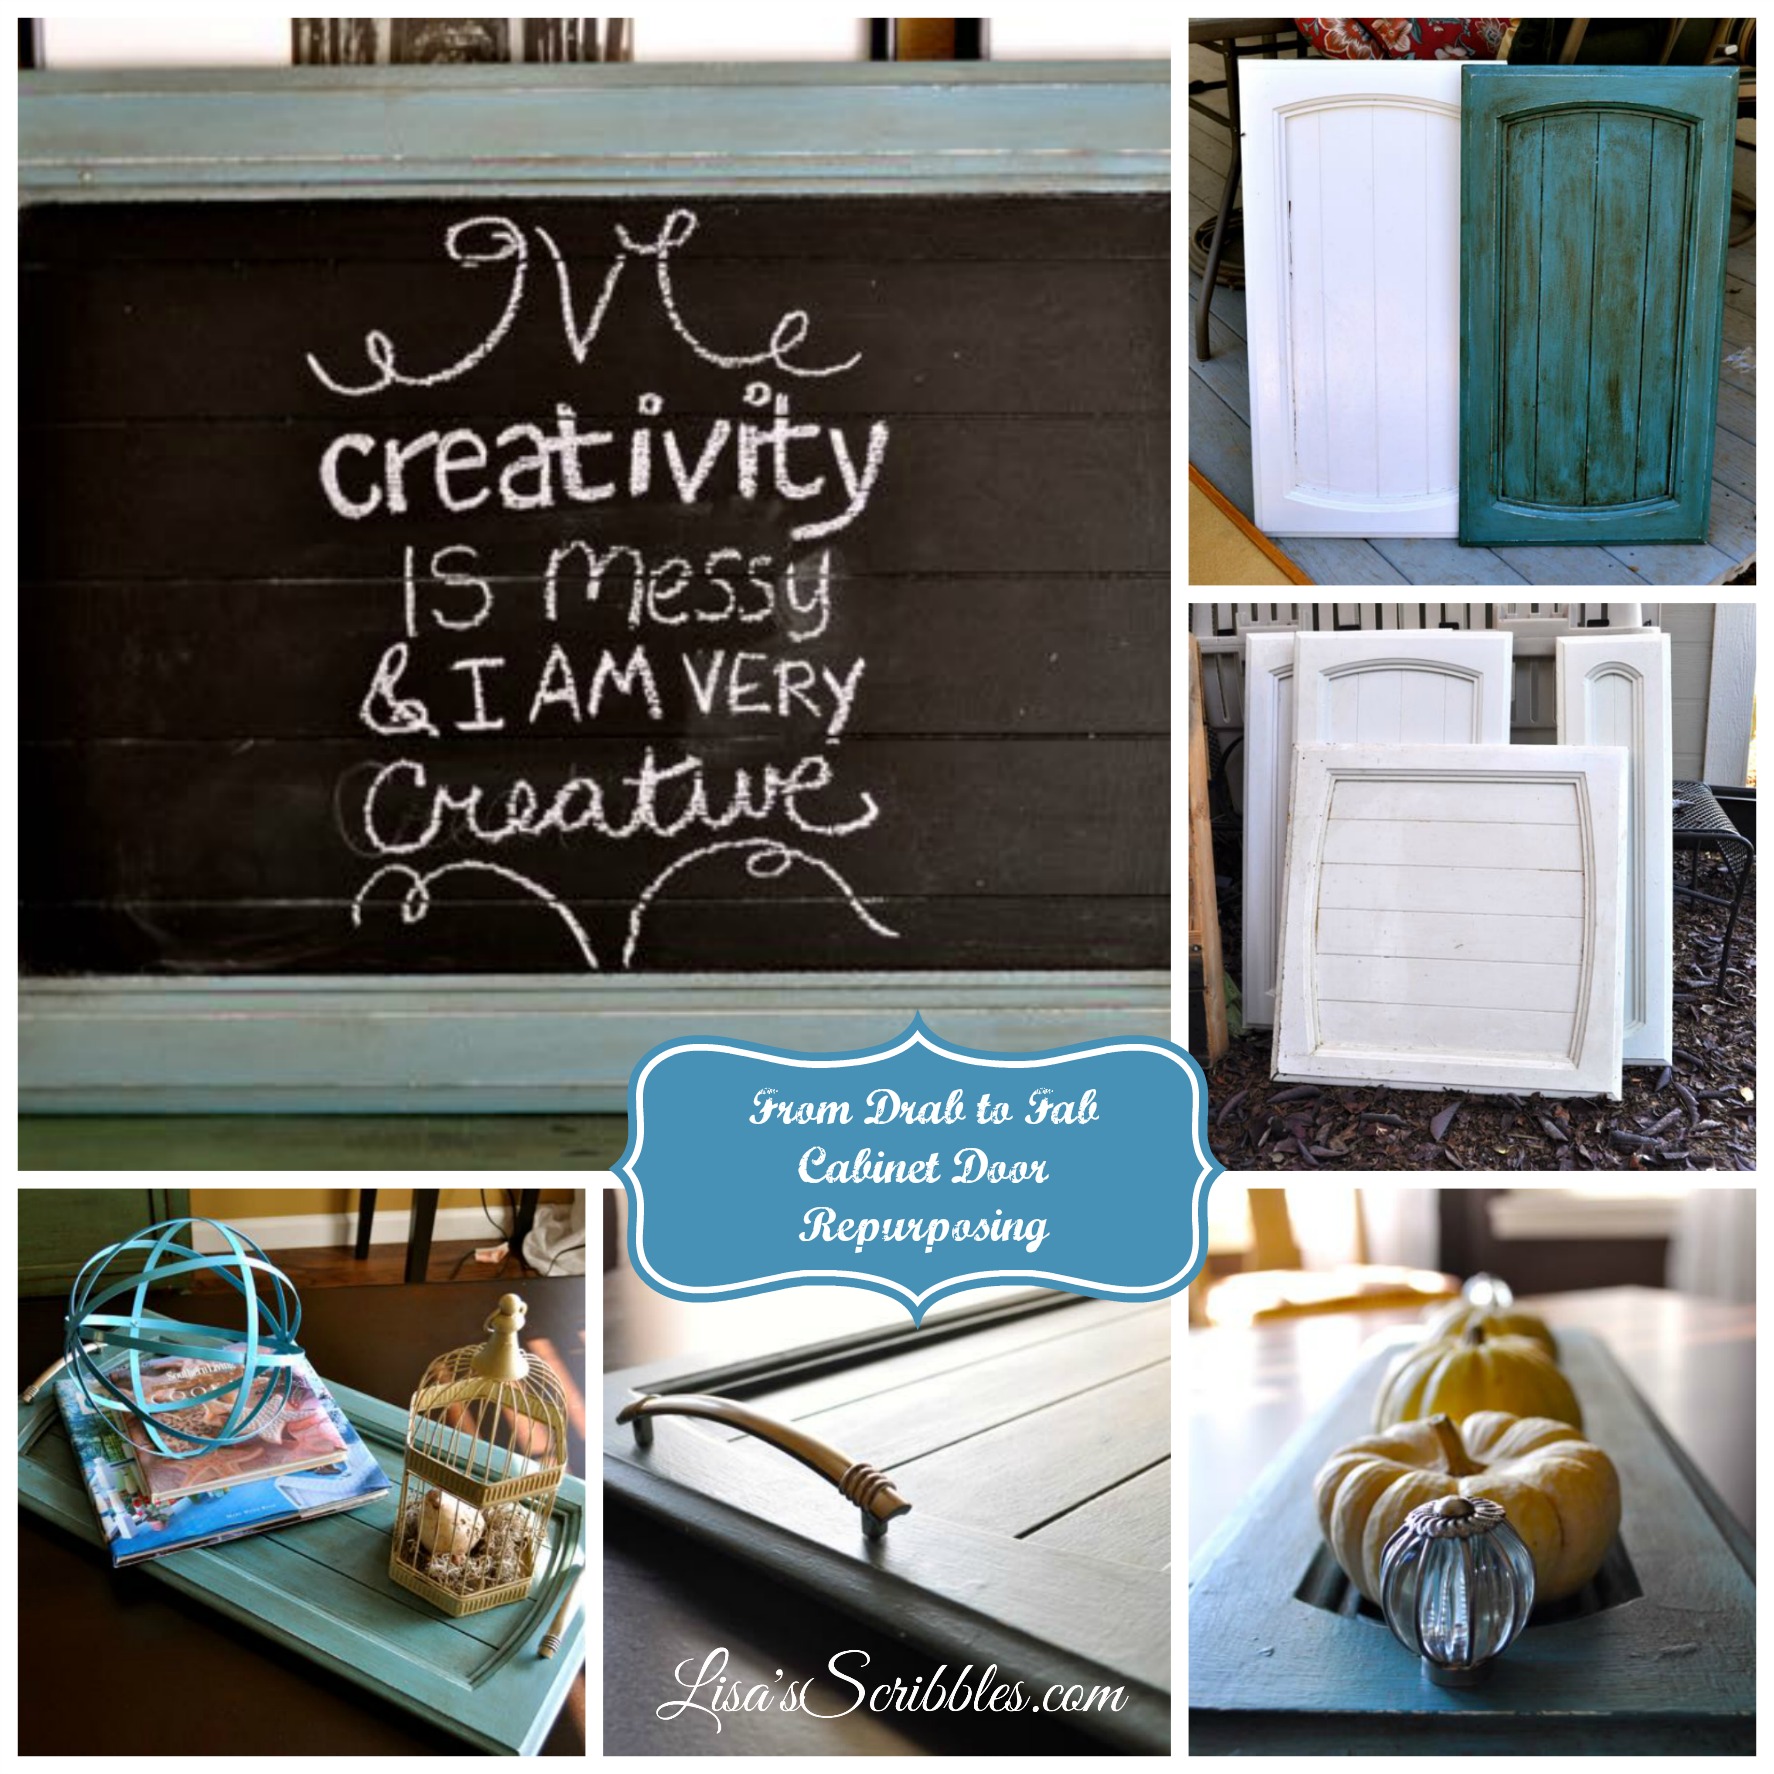
You see this little beauty? Watch for next weeks DIY Christmas blog posts to see what else I’ve been up to. 

Glass Jar Upcycing015


From Drab to Fab – Cabinet Door Repurposing

Talk about your WOW factor, these old cabinet doors from last years Wanna Be Remodel have taken a drastic turn from drab and worn out to super fabulous! 

Cabinet-after-collage

If you’ve been following me for a while you know that I did five major remodels from October 2013 to May 2015, along with me releasing 5 novels. We had my parents home in which we ripped out their old oak flooring and salvaged for our own home, you can see the post here.  Then there was the Kingswood House Remodel, a former rental property that was time to sell. That was a top to bottom overhaul. After that 12 week project came the Wanna Be Remodel…and talk about a mess! It was a rental gone really wrong…I chalk it up to a lossy property management company. Oh and we weren’t done yet because we then had the Fry Rental remodel, yet again another case of terrible property management. And then the last but not least, our own house remodel. Whew…I’m tired just writing this! 

So I say all that to tell you  sometimes you find a gem in all the dirt and muck, a gem that your lovely hubby rolls his eyes at and then says you figure out where to store it. Well my lovely gems came from the Wanna Be Remodel, from the kitchen cabinets to be exact! The old doors had a country charm to them that I just could resist, and I saw a new life for them to showcase the details that had too many layers of paint. They were likely original to the house, or at least 30+ years old. They had so much grime and grease on them that it took a while to get them clean. But the end result is oh so worth it!

Cabinet-collage-before

To start off with, the only prepping I did was to clean off the grim, dirt and dust from the cabinet doors, after that I went at it with some chalk paint. I choose to use what I already had on hand and pre-made from a previous project. I’d had it stored in the garage in  the cupboard with only some plastic wrap covering the plastic container…four months ago! Yup, the chalk paint was still good! I just added a little water to loosen things up a little and went at it. The chalk paint recipe is from my good friend Judy at Vintage Street Designs. You’ll need a jar or container to mix it with, preferable one that a lid can be put on. Start with 1/4 cup plaster of paris (you can find this at any home improvement store in their paint area), 1/4 cup of warm water and 1 cup of flat paint the color of your choice. It’s that simple and that cheap!

cabinets-paint-during

On the larger door I chose to only paint on the outer edges and used chalkboard paint for the center. Just a note, you’ll want to buy the chalkboard paint, it’s not the same as chalk paint. You’ll also need to paint a few coats to make sure it’s all covered. I then decided that I wanted the white paint underneath to show through a little bit, so I took some fine grit sandpaper and worked it over. Once done I pulled out my can of wax and went at it. My first intent was to leave them the Valspar color Flood Tide, but it just seemed a little lifeless to me so I then ended up using my antiquing wax to give it that aged finish that I’ve come to love. 

cabinet-waxing

Waxing is a pretty simple process. I have a special waxing brush that I use for large projects, but since this was small and I was being lazy and didn’t want to wash out my brush, I chose to use a throw-away brush, a chippy brush. If you remember the old Karate Kid movies, you’ll understand when I say, Wax on, Wax off. Okay, that probably really dates me, but it is what it is… I highly suggest you work in small areas when waxing, apply a little then rub it off to get the effect you desire. If the wax gets a little too dark, just rub it off, it’s really that simple. Just a side note, it takes a full 36 hours for the wax to fully cure, you can handle it before, but I’d suggest watching what you put on it until that time is up.

cabinets-waxing-after

Once I finished with the waxing process, I decided they weren’t quite done yet. One of the cabinets was made into a chalk board that I plan on hanging in my kitchen, the other two were going to be trays. I tend to keep scrap pieces of materials around, and pulled out some old cabinet pulls that had been removed from a previous project. They were the right size for the larger cabinets, but the smaller one needed something size appropriate. I had the perfect glass knobs to use for the them too, however, the screws to attached them were a bit on the long side. Easy fix, I just cut them off!

tray-knob-cutoff

Once done, I drilled some holes on the cabinets and attached the handles/knobs. I choose to use a countersink bit on the backside of the cabinets so I’d have a nice flush surface. I also added felt tabs on the backsides so it wouldn’t scratch my furniture when they sat on display. 

cabinet-knobs-after

They turned out pretty fabulous, wouldn’t you say? 

large-tray-after

After finding some tissue paper on Amazon that I adored, I added it to the small tray to give that little extra something. A little tissue paper, a little modge podge… Worked, didn’t it? 

small-tray-collage

And let’s not forget that final piece. The beautiful chalk board that’s going to be hanging in my kitchen soon. Gonna have to work on my chalk writing skills though…

chalk-board


French Country Chair Makeover

French Country Chair makeover collage

I’d had these chairs forever, okay, forever in my book is like 15 years and I’d done little with them because they didn’t inspire me till now. They were supposed to be a temporary solution to us not having any chairs for the dining room table, a temporary fix that lasted 15 years. Do I have chairs for my formal dining room table after 15 years? Uh, no…but that’s a story for another time.

After the big push for the remodel this past January because the youngest was graduating from High School, I added some other things to the list as well. You can’t  remodel and not change everything else with it too–that’d be a sin! Okay, not really, but in my decorator’s handbook, on page 2589, section 23b, it clearly states that if I’m updating a room I must update other items too. Other items ie: chairs, table, cabinets, decor…you get the picture.

It also helped that I was in the remodeling mode and wanted to change them, and since I was kinda going with a French Country theme, I went for it.

FC chair makeover1 with watermakr

This is a close up of what they looked like before, nothing too exciting, kinda plain jane. Years ago I changed out the fabric on the seats, but it was never my favorite, I was just using up leftover materials from a previous project.

French Country chair makeover2 watermark

It really wasn’t different this time in me using up fabric I already had on hand. The material was originally purchased to be used on a roman shade for the kitchen, but I never got around to it and then changed my mind…funny how that happens.

French Country chair makeover3 watermark

The next step was to paint the chairs. I used chalk paint that I made myself. It was pretty easy as I got the recipe from my good friend, Judy, at Vintage Street Designs. It calls for 1/4 c plaster of paris, 1/4 c warm water, and 1 c flat paint. We both prefer Valspar or Behr, but whatever you have lying around will usually work. For this project, I actually used a satin finish paint because that’s what I had. So after painting the chairs, I added the design from Graphics Fairy, she has a large assortment of graphics that can be used for just about any project. Special note, if you’re printing it to go onto a project like say a chair, cabinet, and the sort, then you want to use the “reverse print” file so it will come out properly on the piece.

French Country chair makeover9

I applied the graphic using modge podge on the print side and then let it dry. I then used a damp towel to rub off the paper. It’s a timely task to remove the paper, and one should take care that you don’t rub too hard or you’ll remove the image along with paint, like I did. It was an easy enough fix, though, as I just touched up the paint in the small areas.

French Country chair makeover3 watermark

I then applied antiquing wax because I wanted to give it more of a vintage French Country look. You can see the chair on the right doesn’t have the antiquing wax on it and the one on the left does.


FC chair Collage3

I then attached the fabric using my hand dandy pneumatic stapler, and put them out for display. Pretty cute right?

It’s looking good!


So I made a change, you know, cuz I can. I’ve reworked my web sites yet again and this time I’ve broken off Lisa’s Scribbles for good. Yeah, I went back and forth for a while, thought it’d be good to have everything on one site, but quickly realized it’d be too confusing for newcomers to both my author site and my scribbles site.

Don’t worry, I didn’t get rid of either, they’re still linked, it’s just that I’ve made the Scribbles side more personalized for my second passion, DIY’ing. Take a look around, I think you’ll like the new clean-lined site. It’s pretty easy to navigate and find what you’re looking for.

And now back to work for me…someone’s gotta write those books and create stuff to post!