Author Archives: Lisa

About Lisa

Pinning the wilderness of my imagination, one Pin at a time. I love hiking, camping, watching my boys fish, and taking long walks with my yellow labs, Taylor and Mandi. I enjoy cooking when the mood hits, and not only have I published novels, but I'm the master of redesigning just about anything. I’m the DIY author who has made Idaho her home for 27 years, and I can't wait to spend another 27 years here.

Hometalk Live Demo Links

So many of you watched my Hometalk Live event about Upcycling glass jars and a lot wanted to know where I purchased the materials. So I’ve created a handy-dandy cheat sheet for you so you can recreate your own one-of-a-kind upcycled jar! And just a note, some of these are affiliate links, which means I earn a small percentage back on your purchases if you decide to buy from Amazon. 

Corks for bottles 

Contact paper

Sea Glass Spray Paint

Looking Glass Spray Paint

Crafters Corner: Bulk Vinyl 

Cameo Silhouette 

Hobby Lobby : Knobs, paper crafting supplies, bling for your lids – and everything else!


Who am I?

Who am I?

I’m sure a lot of you are asking that question as you’re coming to my website. You see that I’m a DIY’er, but if you jump onto my Facebook Fan Page, you’ll see that I’m also an author and you’ll find posts about DIY, funny meme’s, and updates about my books.

I’m a creative person at heart, I always have been. I just didn’t realize my potential until later in life. The ability to write books I love and complete DIY projects too.

This world is a funny place sometimes where they say you should only excel at one thing, focus on one goal at a time…and yes I’m doing that in a round about way. I’m focusing on marketing myself. I’m multifaceted and there are many sides–just ask my hubby he’ll tell you how crazy it can get at times.

I have a writing passion, and a DIY drive, both of which are posted here on my Facebook page where I market myself. But I blog about them on different platforms to make it easier for my fans to find what interests them most; book information or DIY projects.

So, those of you who are new, then you’ve come to the right place. If you want DIY projects, you can find them at http://www.lisasscribbles.com/ If you’re new to reading my books, you can find other books at https://www.lisawiedmeier.com/

So if you have a creative side for DIY or want to read great stories, you’re stuck with my creative passion for DIY and books, just like my hubby. It’s just who I am. What I’m hoping is that you’ll embrace both sides of this crazy, kooky woman that I am and enjoy it all.

$15 Wood Pallet Shed

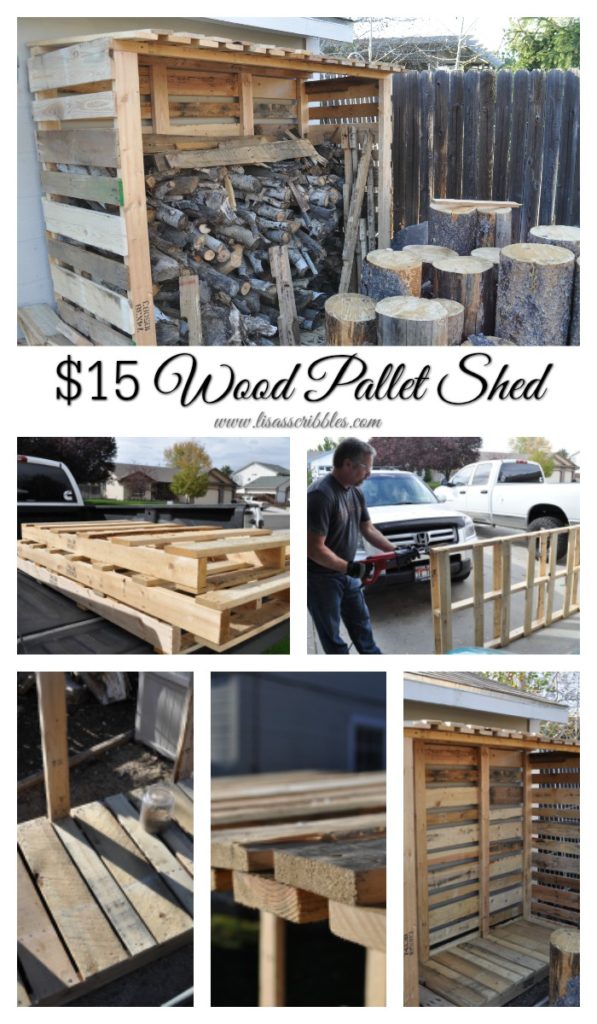
I’m going to start out by saying something here, something that is quite unusual in my household, but here it is… This was the hubby’s idea! Check out his $15 Wood Pallet Shed.

Yup! You heard me right! Now let me point out that over the years my hubby has been very supportive of my projects…okay, let’s be real here, he goes along with my crazy creative side because he, #1 loves me, or #2 is scared of the outcome if he doesn’t. Either one works in my favor, so I roll with it.

But this little wood pallet shed project? This was him 100%! Now I don’t want you to think that he doesn’t want to do things, he’s all about getting things done around the house, but deciding that he wanted to go pallet diving, a.k.a. dumpster diving for materials, that was a bit of a shocker. You see I’m the crazy one in our relationship, just ask our friends, they’ll tell you the truth, the hubby’s the calm, sane one. 

Okay, so enough of my jabbering and let’s move on with this lovely little number!

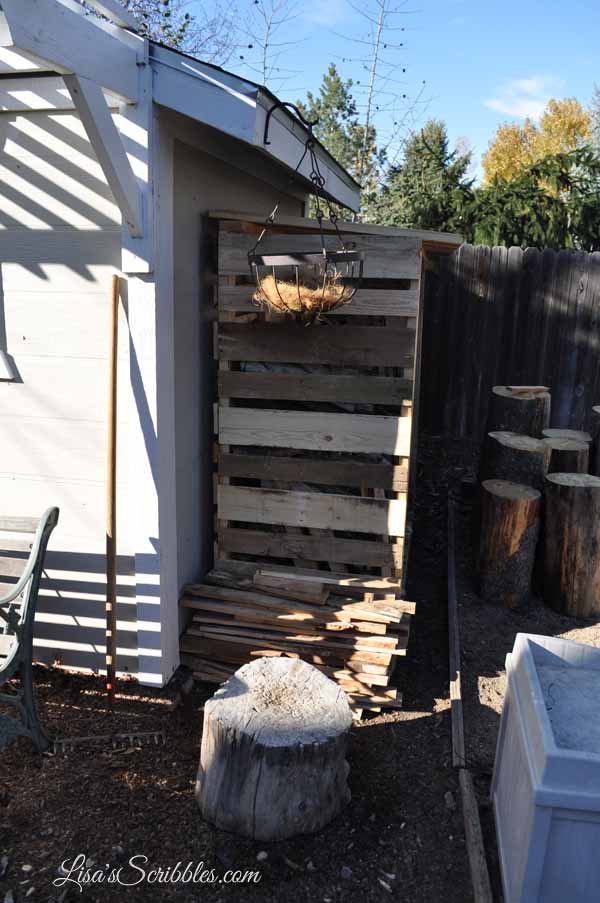
The hubby got the idea from Pinterest after searching for some wood storage sheds. We have a fire pit we built a few years ago in the backyard, and the firewood was currently being stored on the ground next to the shed. He thought it was messy and wanted to tidy it up a bit and I couldn’t have agreed more. Here was his inspiration:

screen-shot-2016-11-07-at-1-50-02-pm

wood-pallet-sheddsc_0484

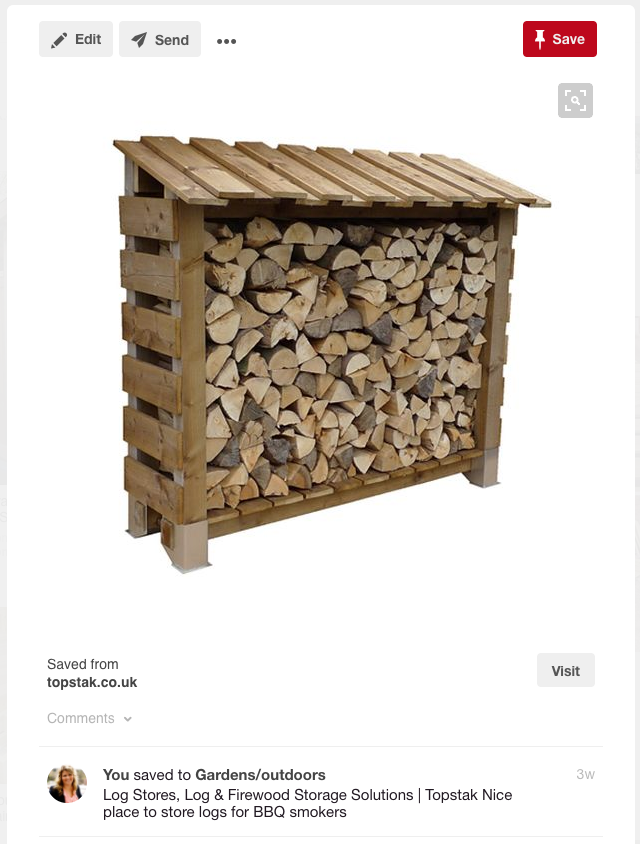
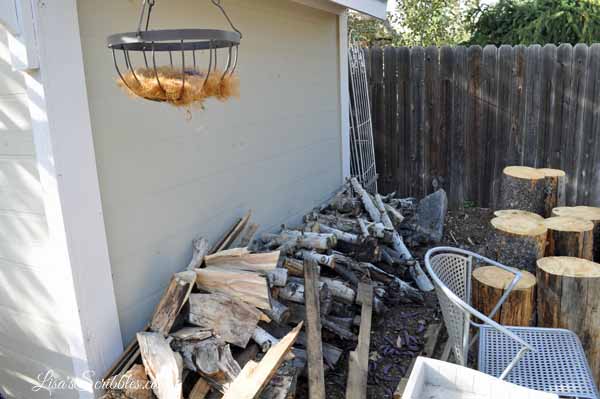
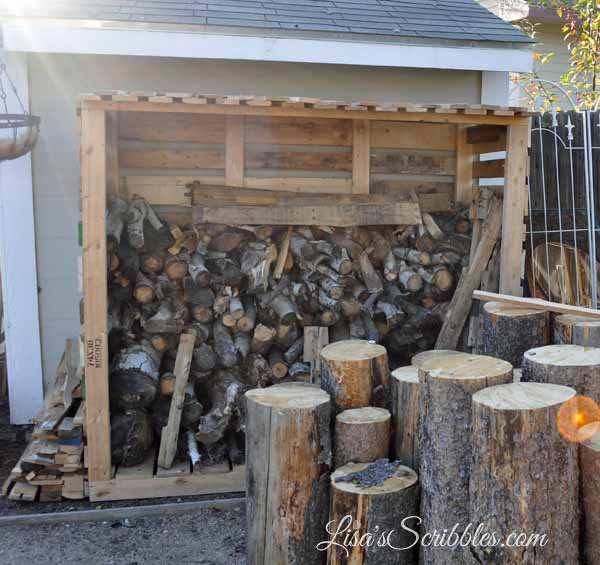
You see, it was an eyesore. wood-pallet-sheddsc_0482

You didn’t have to ask me twice to get involved in this lovely little number, the moment he expressed his interest I was all over it like bees on honey. I went on the search for some pallets and came across two Facebook posts where friends were looking to get rid of some. We got lucky too because a few of them were extra long pallets, the other’s I ended up purchasing from a church for $1 a pallet, which is where the $15 expense came from. Other than the pallet purchase, we had everything on hand to make this project on the cheap.

wood-pallet-sheddsc_0431

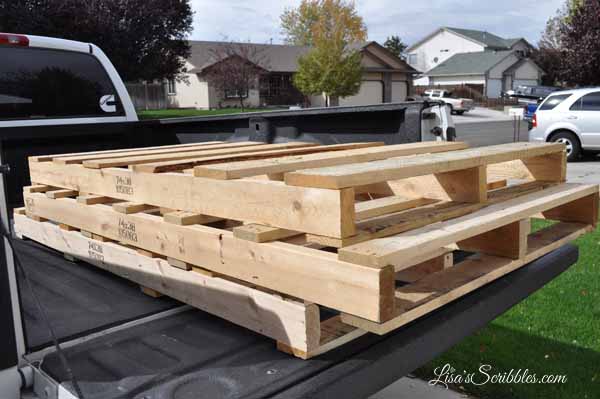
We had three of the long pallets, 74×38, and 16 of the smaller 30×30 pallets.

wood-pallet-sheddsc_0428

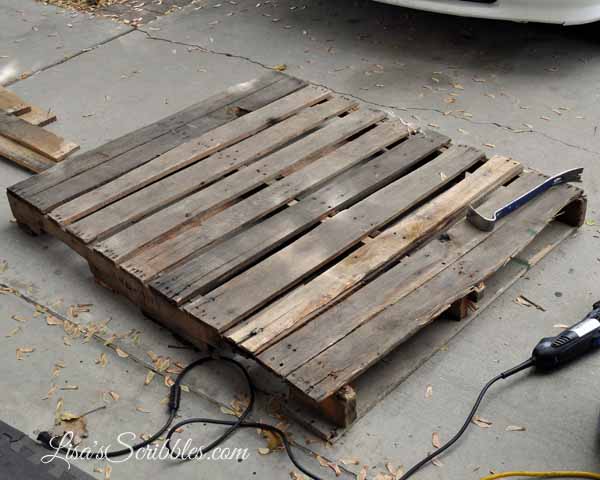
The first step was to cut them apart. You can go ahead and use a pry bar, but we found it was faster and safer (minus the yelling as the wood split from sheer force) to use a reciprocating saw with a metal saw blade. 

wood-pallet-sheddsc_0433

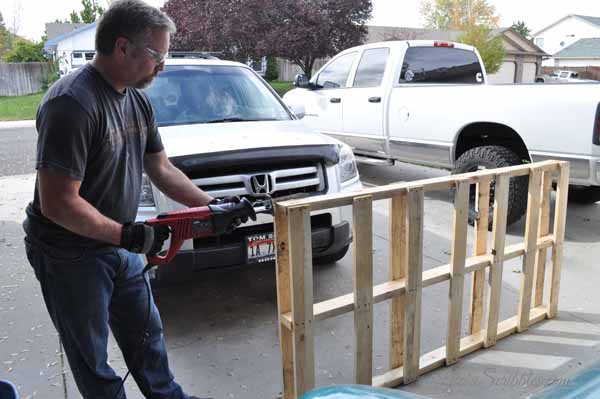
It can be done with one person, but honestly, it’s easier with two. One to hold while the other cuts.  A little less dangerous too for everyone involved. 

wood-pallet-sheddsc_0486

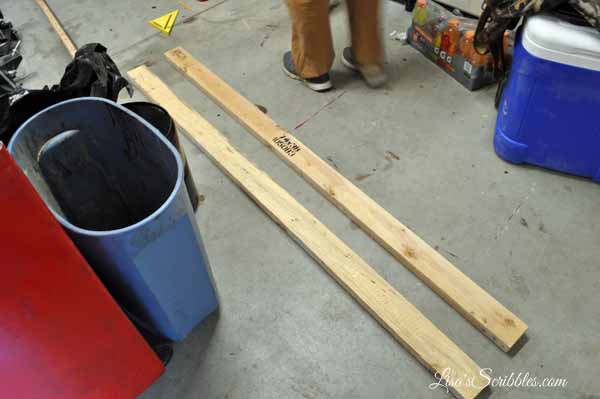
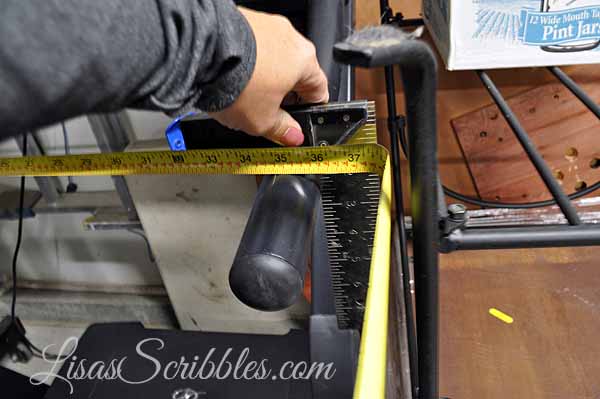
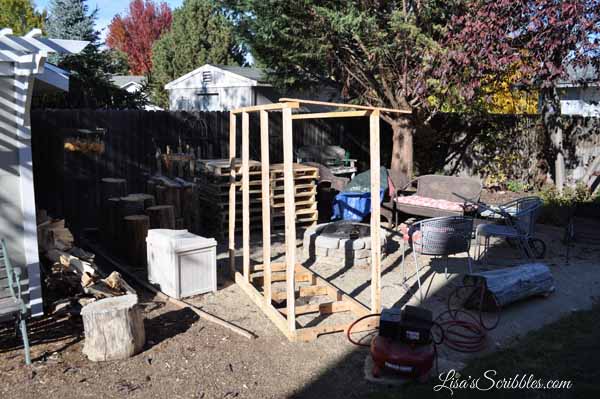
Next step was to measure out the length we wanted for the floor framing to be. We made the supports 72″ long.

wood-pallet-sheddsc_0487

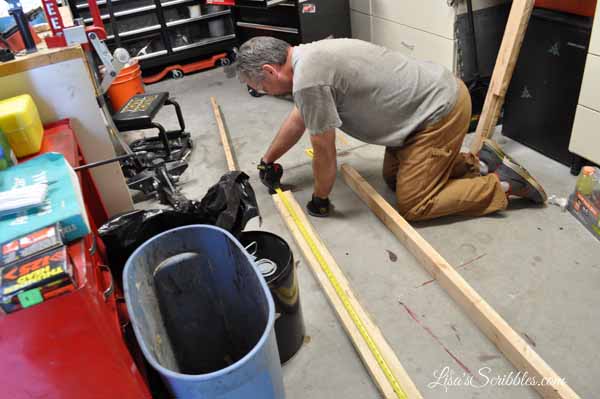
We then created a rectangular box. We used the 2x4s from the pallets we dismantled. 

wood-pallet-sheddsc_0491

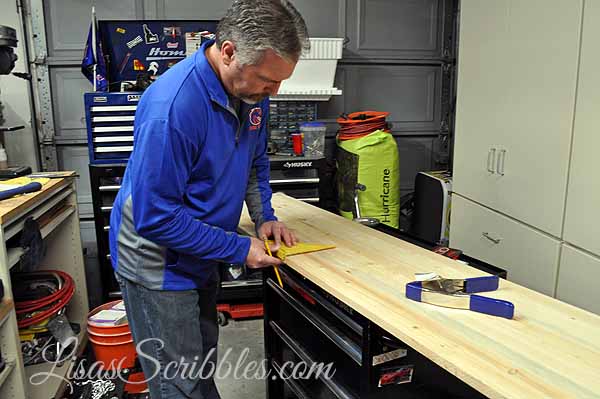
The hubby cut them to 25″ making the entire width of the shed 28″ wide.

wood-pallet-sheddsc_0492

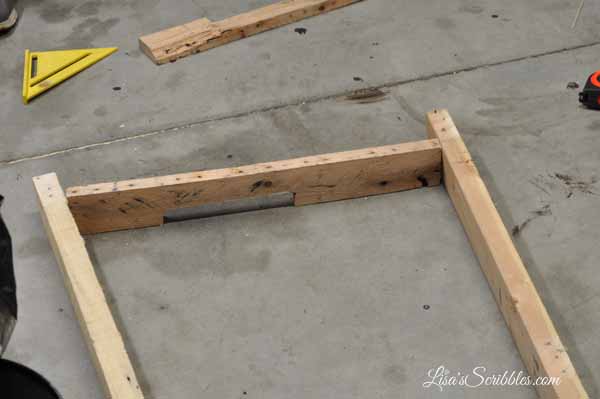
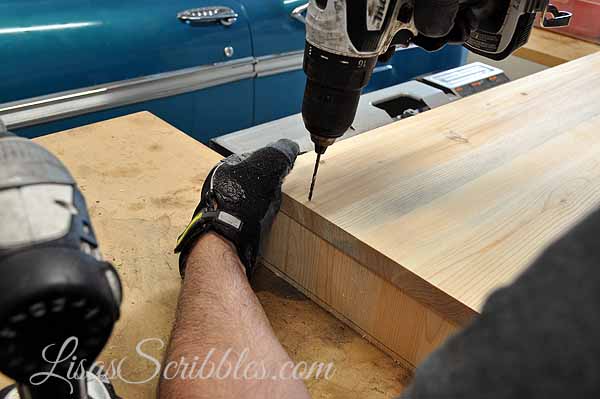
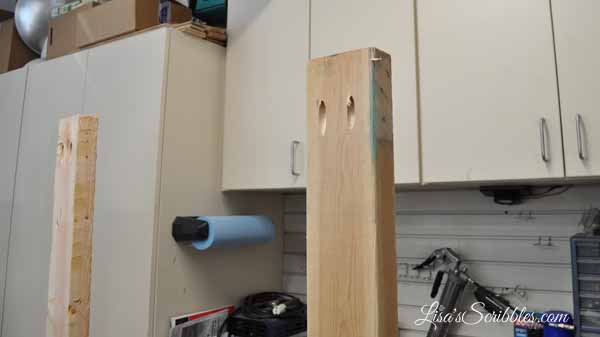
He then screwed them together, and we moved onto the inside framing. 

wood-pallet-sheddsc_0499

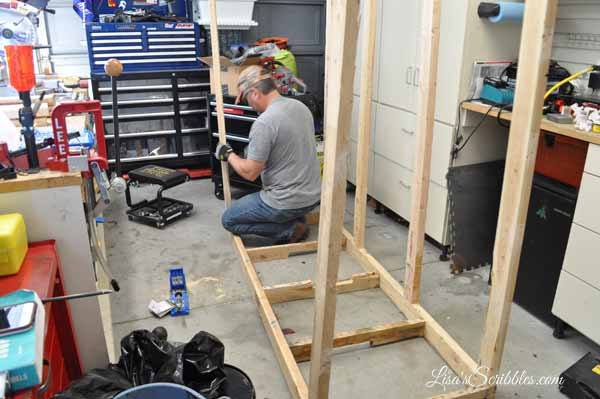
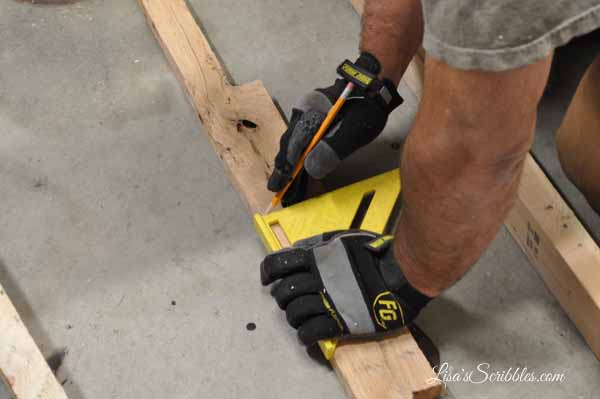
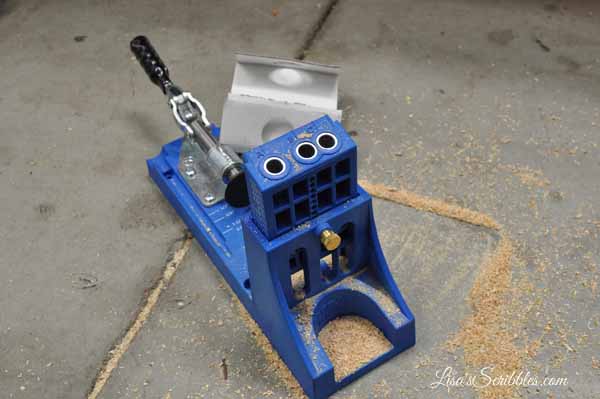
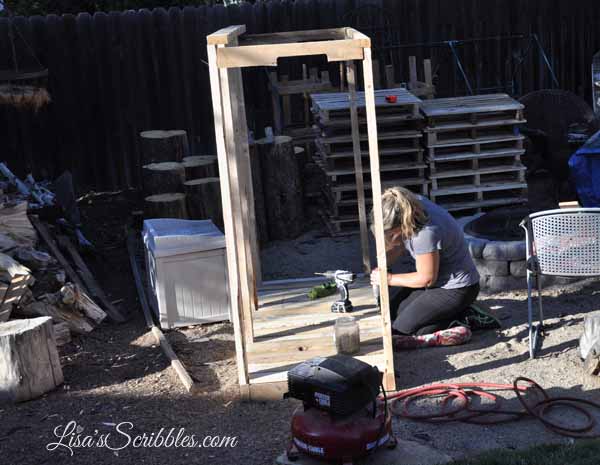
We used our Kreg jig to secure them to the bottom frame. 

wood-pallet-sheddsc_0500

wood-pallet-sheddsc_0501

wood-pallet-sheddsc_0503

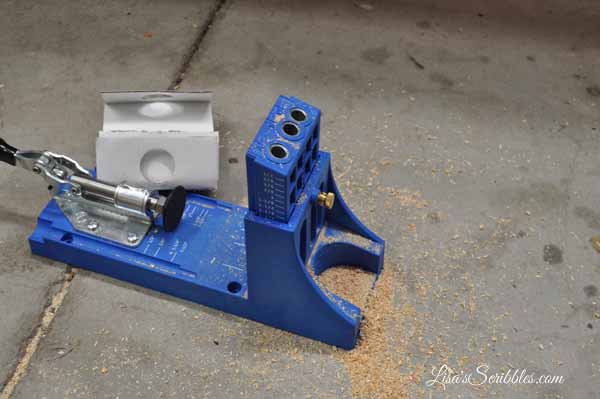
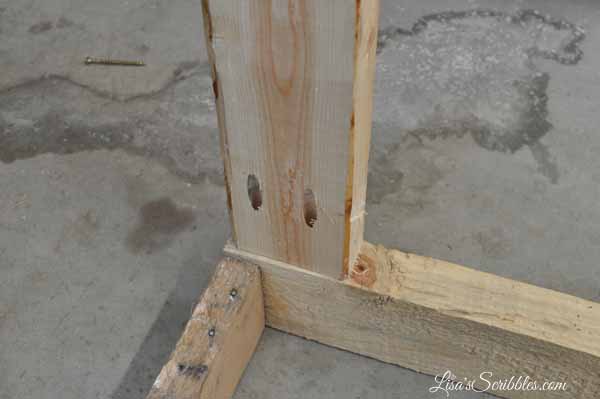
One thing to note, make sure you do both sides of your 2×4’s before attaching them to the frame.

wood-pallet-sheddsc_0507

wood-pallet-sheddsc_0504

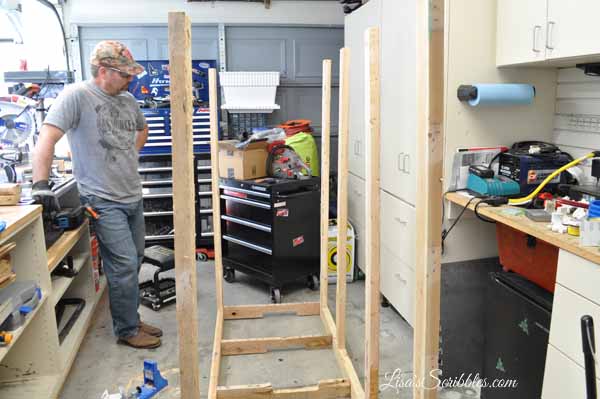
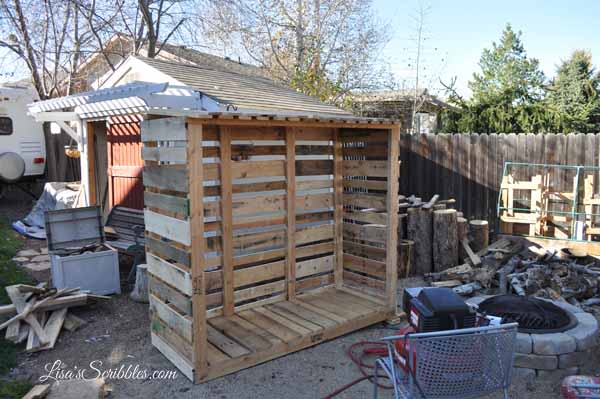
We then attached our roofing structure, again using wood from the pallets.

wood-pallet-sheddsc_0510

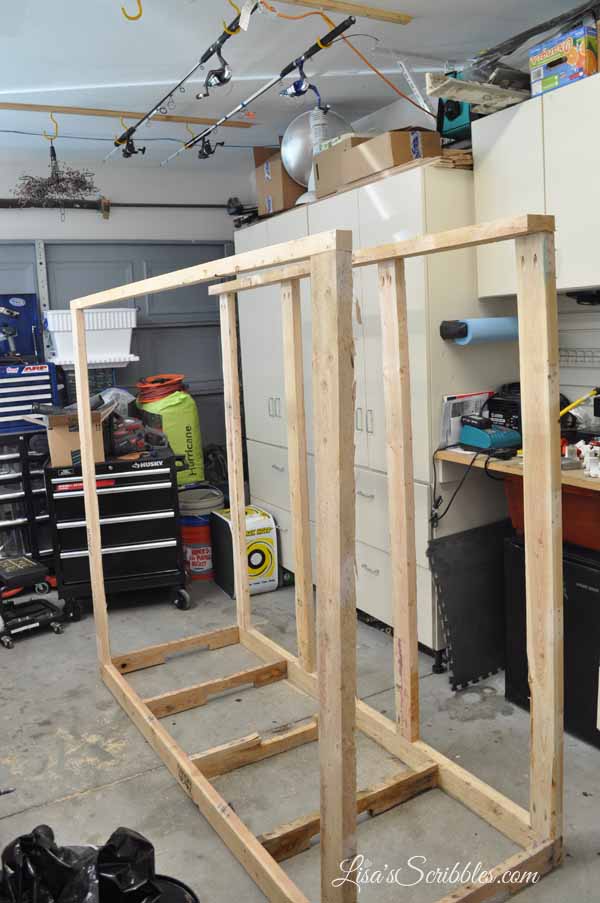
It’s a little wobbly at this point until you get your upper supports in place. 

Before we attached our upper supports, we moved it outside because I was afraid it wouldn’t fit through the narrow garage door soon. The hubby took pity on me, and we moved it closer to its new home.

wood-pallet-sheddsc_0513

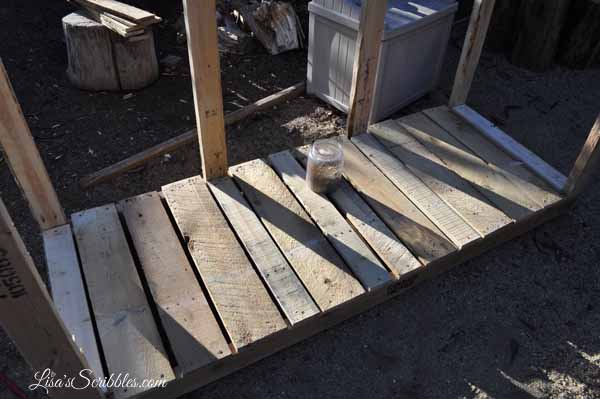
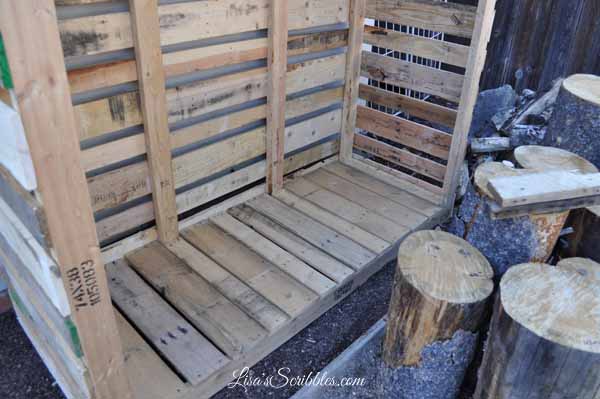
After adding the upper supports, we began to place the flooring on because we didn’t want the firewood to be sitting on the ground anymore. I predrilled my holes first and then used wood screws to secure it to the base. 

wood-pallet-sheddsc_0514

You see this guy? He’s soooo excited that I’m helping him…or he got hold of the camera and snapped himself a selfie for me to find. Silly guy!

wood-pallet-sheddsc_0520

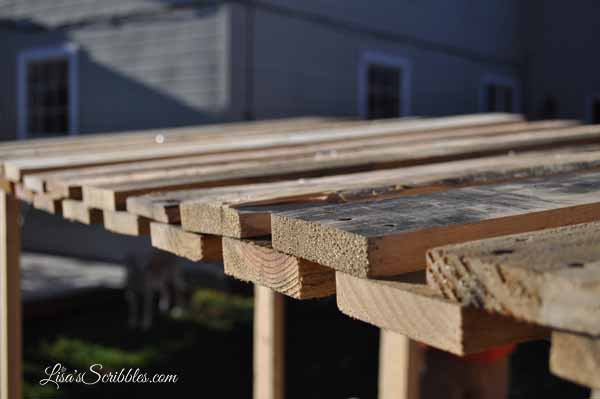
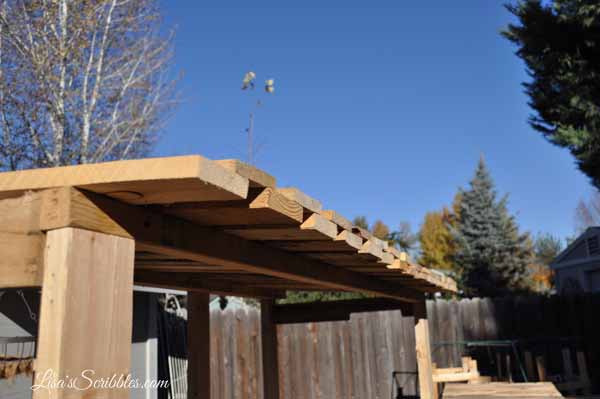
After the flooring was securely attached, we moved onto the roof. Now the hubby had a very specific design in mind, and I liked the architectural feeling it gives to the project.

wood-pallet-sheddsc_0524

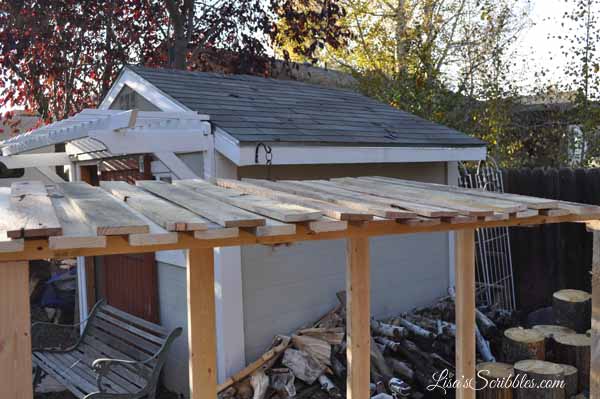
We attached the roofing using our pneumatic stapler and cut the pieces to 35″ so we’d have some overlapping. We also ensured that we had the roof on an angle so the water would run off.

wood-pallet-sheda

wood-pallet-sheddsc_0007

wood-pallet-sheddsc_0006

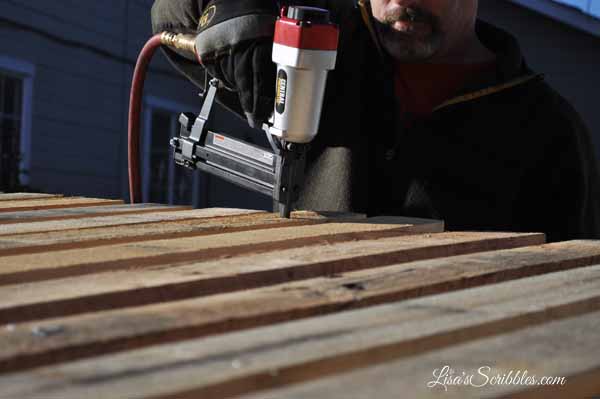
Yeah, and there’s the hubby looking at me and saying in his mind quit taking pictures and get over here and help me!

wood-pallet-sheddsc_0002

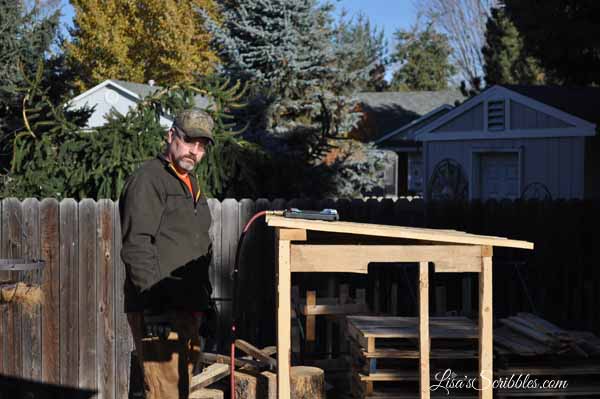
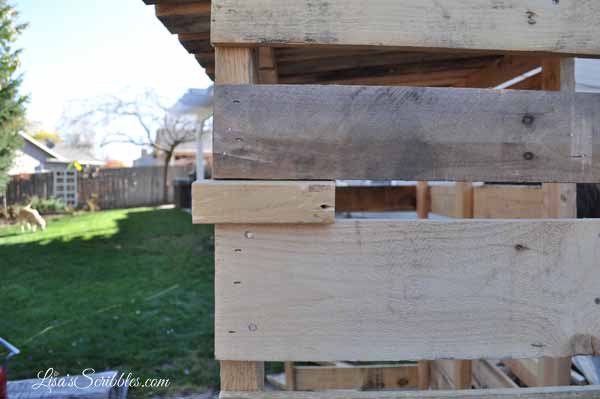
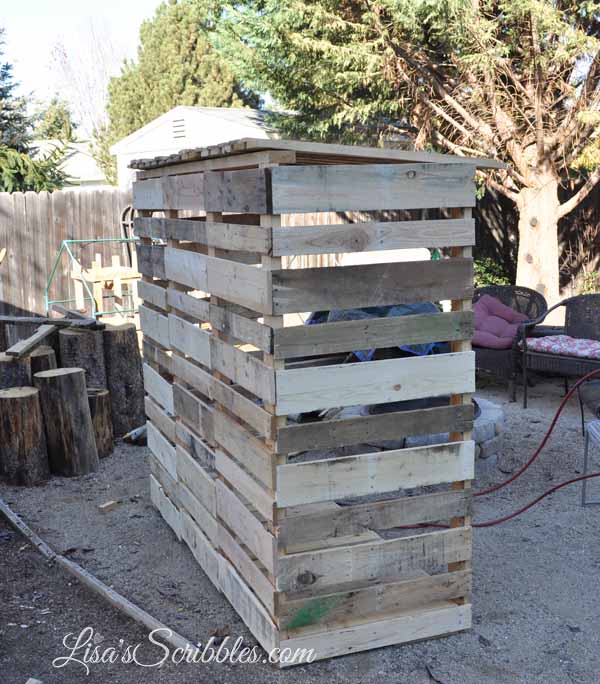
The next step was to cut and attach the side pieces. We used a 1.5×1.5 wood block as our spacer because we wanted the wood to breath so it’d dry out and not mold. Keep in mind that you do need to level off the first board so you’re not running crooked. 

wood-pallet-sheddsc_0014

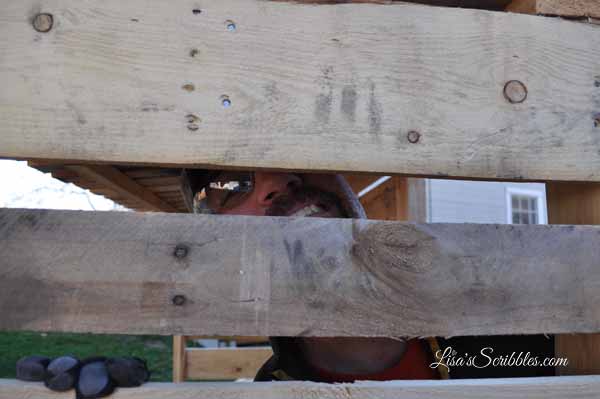
Yeah, there he is playing peek-a-boo instead of working.

wood-pallet-sheddsc_0015

wood-pallet-sheddsc_0017

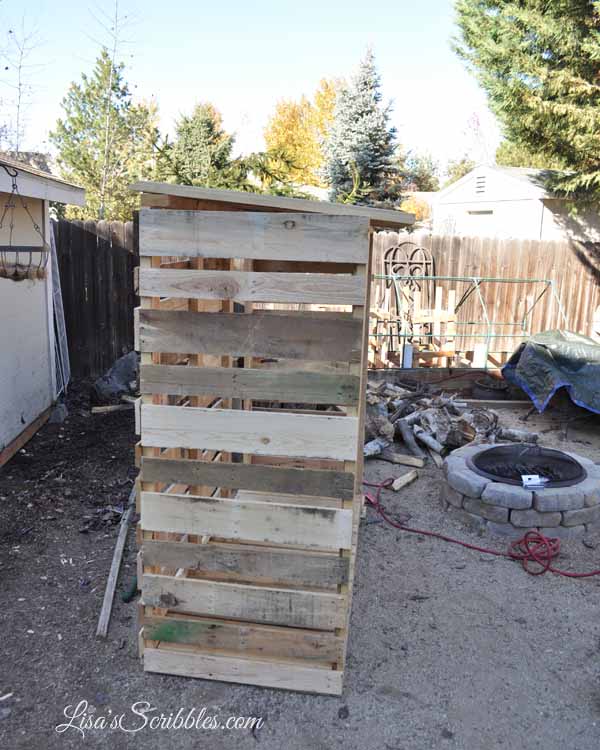
Looking pretty great, right? 

wood-pallet-sheddsc_0018

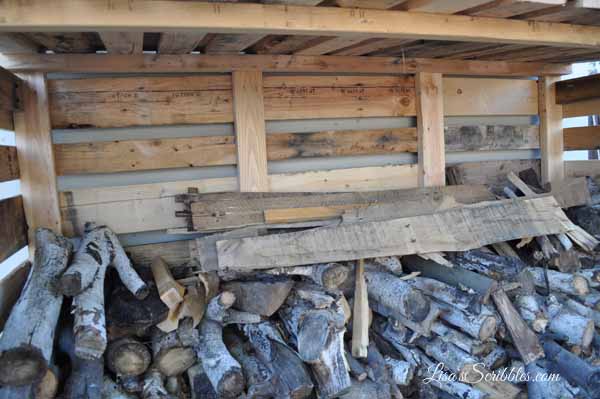
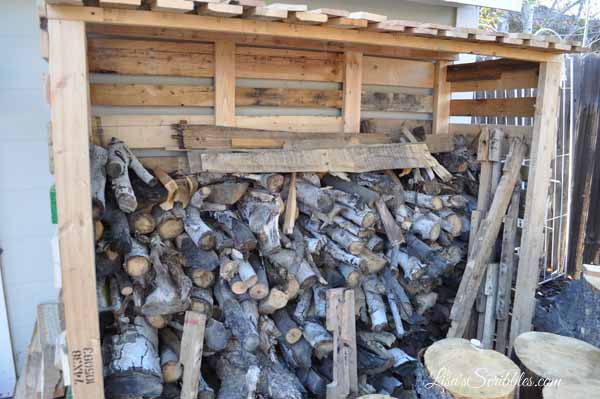
As you can see, we weren’t going to perfection here. Wood pallets come in all shapes and sizes, so you just have to work with the materials you have. Some pieces are thicker, and some are thinner.

wood-pallet-sheddsc_0022

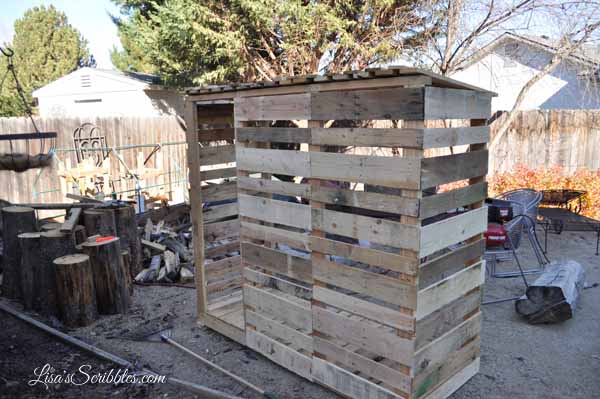
I gonna go ahead and call it…the hubby has some skills. I’ve been telling him this for years, but he always thought it was because I was trying to woo him into helping me, which I’m not going to deny, but it was the truth. 

wood-pallet-sheddsc_0023

He took something from nothing and made a functional wood storage shed. 

wood-pallet-sheddsc_0027

wood-pallet-sheddsc_0029

wood-pallet-sheddsc_0033

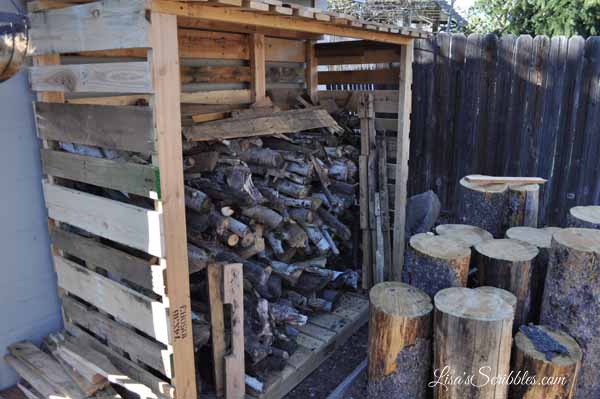
Much neater I’d say.

wood-pallet-sheddsc_0034

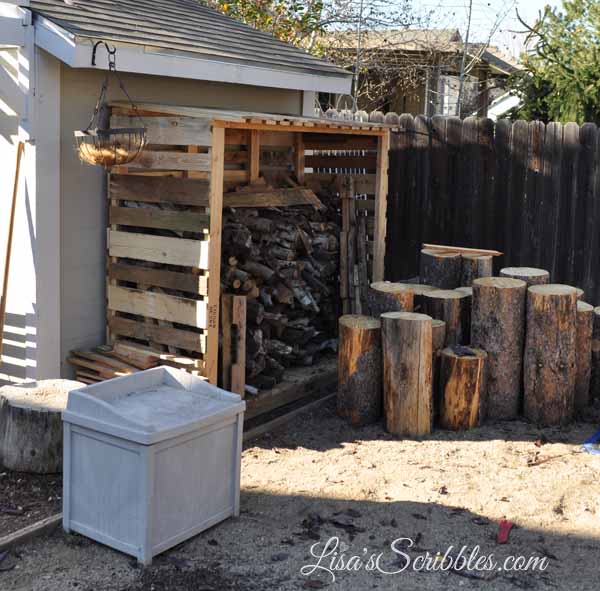
Neater and functional.

wood-pallet-shedd

wood-pallet-shedc

wood-pallet-shedb

I got lucky with him! Until next time, laters!

Hometalk & Lisa’s Scribbles

A thing happened this week. What thing happened you ask? Well, let me tell you what thing took place…I was invited to do a live Facebook demo for Hometalk!! Is this a big deal? Kinda? Am I thrilled beyond belief that they think I’m good enough to do a demo? Oh yeah!! Am I a bit nervous about doing a live Facebook demo for Hometalk? Need you ask?

Let me take you back a few years, to December 2013. I created a post for my DIY Christmas project, and it was how to create Candy Jars for gifts. I was touting that you can recycle old jars you have lying around. Okay, I’m probably the weird one here who keeps those old spaghetti and pickles jars, but it works for me, I like to come up with different uses for them–and did. 

I decided two years later to share this post on Hometalk in December 2015. What happened next isn’t what I expected. Since that post went live, it’s been viewed over 543K times on Hometalk. Shared to Facebook 852 times, pinned to Pinterest 6.5K times, and saved on Hometalk 512 times and the comments? 175 and the totals are still rising! 

DSC_0148

Check out the link here: Hometalk DIY Candy Jars

So as a followup to this well-received post, I did an updated version to my DIY Christmas posts in December 2015 titled UpCycling Glass Jars. Well, guess what happened next? It’s been going crazy too!

So far my Upcycling Glass Jars post on Hometalk has been viewed 156K times, shared on Facebook 192 times, pinned to Pinterest 1.9K times, and saved on Hometalk 117 times! 

Glass Jar Upcycing026

Check it out here: DIY Christmas Upcycling Glass Jars

So when Hometalk was looking for bloggers to put themselves out there with their projects, I took the plunge and submitted a couple of projects. While they loved the ideas, they asked me instead to do a demo on how I make my Candy Jars/Upcycled Glass jar projects! 

What does this mean for you? You get to watch me live on Facebook on, Monday, December 5th, at 7 p.m. EST or 5 p.m. MTN time and see how this creative, crazy crafty mind of mine works! And boy do I have some fun updates on the project as well. Come October every year I need to be banned from places like Hobby Lobby and Michaels–according to my hubby who of course thinks I go crazy there. Me? I have no idea what he’s talking about…

What else does this mean? I mean that I’m more than an author, I’m a DIY’er too. It also means that the more I put myself out there by marketing me, the more potential readers that I get to bring into the fold. And who doesn’t want more CATTS* suffers like the rest of you?  I do! 

*Chronic Addicition to Timeless Series

$15 DIY Walking Desk

I’ve been wanting a walking desk for a while now–like over 2 years, but when I saw how much they cost for a pre-made one from places like Amazon, my jaw dropped open. Now while these desks are awesome, not only was it too big, but it was also too expensive for me to justify buying one. 

screen-shot-2016-11-01-at-12-23-31-pm

Now, if I had my treadmill in my office, and I worked 6 of the 10+ hours I spend in my office on the treadmill, I might take the plunge. But it’s a big plunge to take if you’re not even sure if you’d use it all the time or if you could type/work while walking. So being the creative person I am, I started researching ways I could make one on the budget friendly side. Sure there were quite a few pins and such out there, but a lot of them just required more work than I thought necessary. So, the hubby, being the resourceful man that his is (and by that I mean cheap), came up with a plan to make a quick and easy walking desk for me to use. Like as in under $15 cheap.

And I like it. A lot.

walking-desk020

For starters, I purchased a 3/4 x 16 x 72 piece of paint grade wood from my local home improvement store for under $15. You could buy it shorter, but I have plans for the remaining wood.

walking-desk002

We then took the measurement for the width of the treadmill which just happened to be 36″. 

walking-desk004

We added 1 and 1/4 inches to accommodate the side rails and cut the 3/4 x 16 x 72 board down to the 37 1/4″.

walking-desk005

Then we cut two 3″ pieces from the leftover material for the side supports.

walking-desk009

Once cut, we used wood glue and pre-drilled holes to sink the 2″ wood screws into. 

walking-desk011

walking-desk012

walking-desk014

We added some 2″ wood screws to secure it in place. 

walking-desk016

And then slid it over the treadmill rails for a nice snug fit. 

walking-desk017

walking-desk018

walking-desk019

And let me tell you that desk isn’t going anywhere! I’ve already been trying it out and it fits like a glove. Now, I’m not running while I’m writing or working on the computer, which would be a little crazy dangerous, but a slow pace is allowing me to not only bring movement to my legs but also getting my mind working with more ideas! 

walking-desk021

My own piece of heaven…in the garage of all places! lol But heck, I’ll take what I can get since I don’t have a basement or spare room for it.

walking-desk022

walking-desk024


Pretty snazzy, right?